

Ultimate Guide
to Sterile Processing
Prep & Pack
Evidence-Based Assembly, Packaging, Labeling, and Sterility Assurance for Every Sterile Processing Setting
The Invisible Work That Reaches the Sterile Field
Prep & pack is the clean-side stage of the surgical instrument reprocessing cycle where decontaminated instruments are inspected, assembled into sets, and packaged for sterilization. It is the last human quality checkpoint before an instrument is sealed and rendered sterile.
Every surgical instrument used on a patient passes through the prep & pack area before it reaches the operating room. A missing instrument, a failed chemical indicator, a torn wrap, or a malfunctioning needle holder becomes an OR crisis. The options for correction narrow dramatically once the package is opened at the sterile field.
This guide covers everything: definition, regulatory framework, equipment, the 8-step assembly playbook, inspection, packaging selection, sterility assurance, environmental controls, risk assessment, troubleshooting, and training standards.
All citations are marked with superscript numbers throughout the text. A complete Master Works Cited list appears at the end of the guide. Primary operational reference: HSPA Central Service Technical Manual, 8th ed. (2016), Chapter 12. Note: the 9th edition (2023) is now the current CRCST exam reference.
What Is Prep & Pack in Sterile Processing?
Definition and Position in the Workflow
The HSPA Central Service Technical Manual defines the preparation and packaging area as a clean area of the sterile processing department (SPD) where instrument inspection, assembly, and packaging are performed.4 The position of prep & pack in the reprocessing workflow is fixed and sequential:
Assembly area — A clean area of the Central Service department where instrument inspection, assembly, and packaging are performed. Also called the Preparation and Packaging (prep and pack) area. (HSPA, 8th ed.)
The "Last Line of Defense" Before Sterilization
HSPA describes prep & pack as the final human quality checkpoint before an instrument is sealed and sterilized.4 Once a package is sealed, labeled, and sterilized, the quality judgments made in prep & pack are locked in. There is no subsequent opportunity to catch a missing instrument, a cracked retractor, or a misidentified clamp until the package is opened at the sterile field — at which point the surgical case is already in progress.
Why Prep & Pack Matters
Every surgical instrument used on a patient passes through prep & pack before it reaches the OR. A missing instrument, a failed chemical indicator, a torn wrap, or a malfunctioning needle holder doesn't become a problem until it reaches the sterile field — and by then, the options for correction narrow dramatically.
Patient Safety
Undetected soil, assembly errors, packaging defects, and instrument failures travel directly to the sterile field and the patient. Surgical site infections (SSIs) are the most frequently occurring and costly healthcare-associated infection, accounting for approximately $3.3 billion in annual costs to the U.S. healthcare system, with an average per-case cost of $20,785.7
Sterility Assurance & Cost
A perfect sterilization cycle cannot fix a poorly packaged set. Errors caught at the sterile field are exponentially more costly than errors caught in prep & pack. The estimated annual financial impact at a single institution: $6.75M–$9.42M in lost chargeable OR minutes.1 An 85% reduction in packaging defects was achieved through process standardization alone — no new equipment, no additional staffing.3
Regulatory & Accreditation
The Joint Commission, CMS, DNV, and state accreditors review prep & pack practices during surveys. In 2018, more than 50% of hospitals surveyed by TJC were found noncompliant with IC.02.02.01, EP2 (HLD and sterilization standards).9
Traceability
Standardized labeling practices in prep & pack are the foundation of any meaningful sterilization load recall capability. Without accurate, consistent labeling, traceability collapses at the moment it is most needed: a patient infection investigation.5
The Regulatory Environment
Prep & pack is governed by a layered standards framework. The single most important principle: the manufacturer's IFU for any specific device, tray, container, or packaging product always takes precedence over general guidance when it is more specific. Standards set the floor. IFUs define the specific requirements for each product.
| Standard / Body | Scope in Prep & Pack | Key Document |
|---|---|---|
| AAMI ST79 | Steam packaging, CI use, labeling, storage, QC | ANSI/AAMI ST79:2017/(R)2022 |
| AAMI ST77 | Rigid containers; 25-lb weight limit | ANSI/AAMI ST77:2013/(R)2018 |
| HSPA | Operational reference; CRCST certification | 8th ed. (2016); 9th ed. (2023) at myhspa.org |
| AORN | Perioperative packaging; point-of-use inspection | Guidelines for Perioperative Practice (current) |
| FDA | Packaging device clearance; IFU compliance | 510(k) database |
| TJC / CMS / DNV | Accreditation surveys; IC and EC standards | IC.02.02.01 and related |
| Manufacturer IFU | Device-, tray-, container-, and packaging-specific requirements — overrides general guidance | Product-specific IFU documents |
Equipment & Materials
A well-equipped prep & pack area is a clinical workspace designed to support precision, documentation, and ergonomic demands. Equipment selection and maintenance directly affect error rates, staff safety, and product quality.4
Workstations
Prep & pack workstations should be purpose-built for instrument inspection and tray assembly. Key design criteria: height-adjustable work surface; impervious, non-porous, cleanable surfaces; adequate task lighting at a minimum of 50 foot-candles at the work surface per ANSI/AAMI ST79;5 and integrated proximity for count sheets, indicators, and consumables. The Nichol and Saari research identified fatigue and stress in high-throughput environments as direct contributors to visualization errors.2
Magnification & Visualization Tools
Given that 88.6% of observed instrument errors arose from visualization failures,2 magnification and lighting are clinical tools, not optional enhancements. Tools include: magnifying lamps; digital inspection cameras for channel and lumen visualization; borescopes for articulating and flexible instrument inspection; and photographic references to ensure correct instrument configuration.4
Documentation Tools
Instrument Testing Tools
Protective Accessories & Consumables
Tip protectors and protective sleeves, silicone finger mats, instrument stringers and racks, holding brackets and posts. All disposable packaging components carry expiration dates — expired materials must not be used. Consumable expiration monitoring, including tray liners, wicking material, chemical indicators, and disposable container filters, should be part of the daily area check.5
The Assembly Playbook:
Sterile Processing Tray Assembly Steps
The primary goal of every assembly is to build a pack that is Functional, Accurate, and Neat (the FAN principle), and that will allow complete sterilant contact with every surface of every instrument inside it.
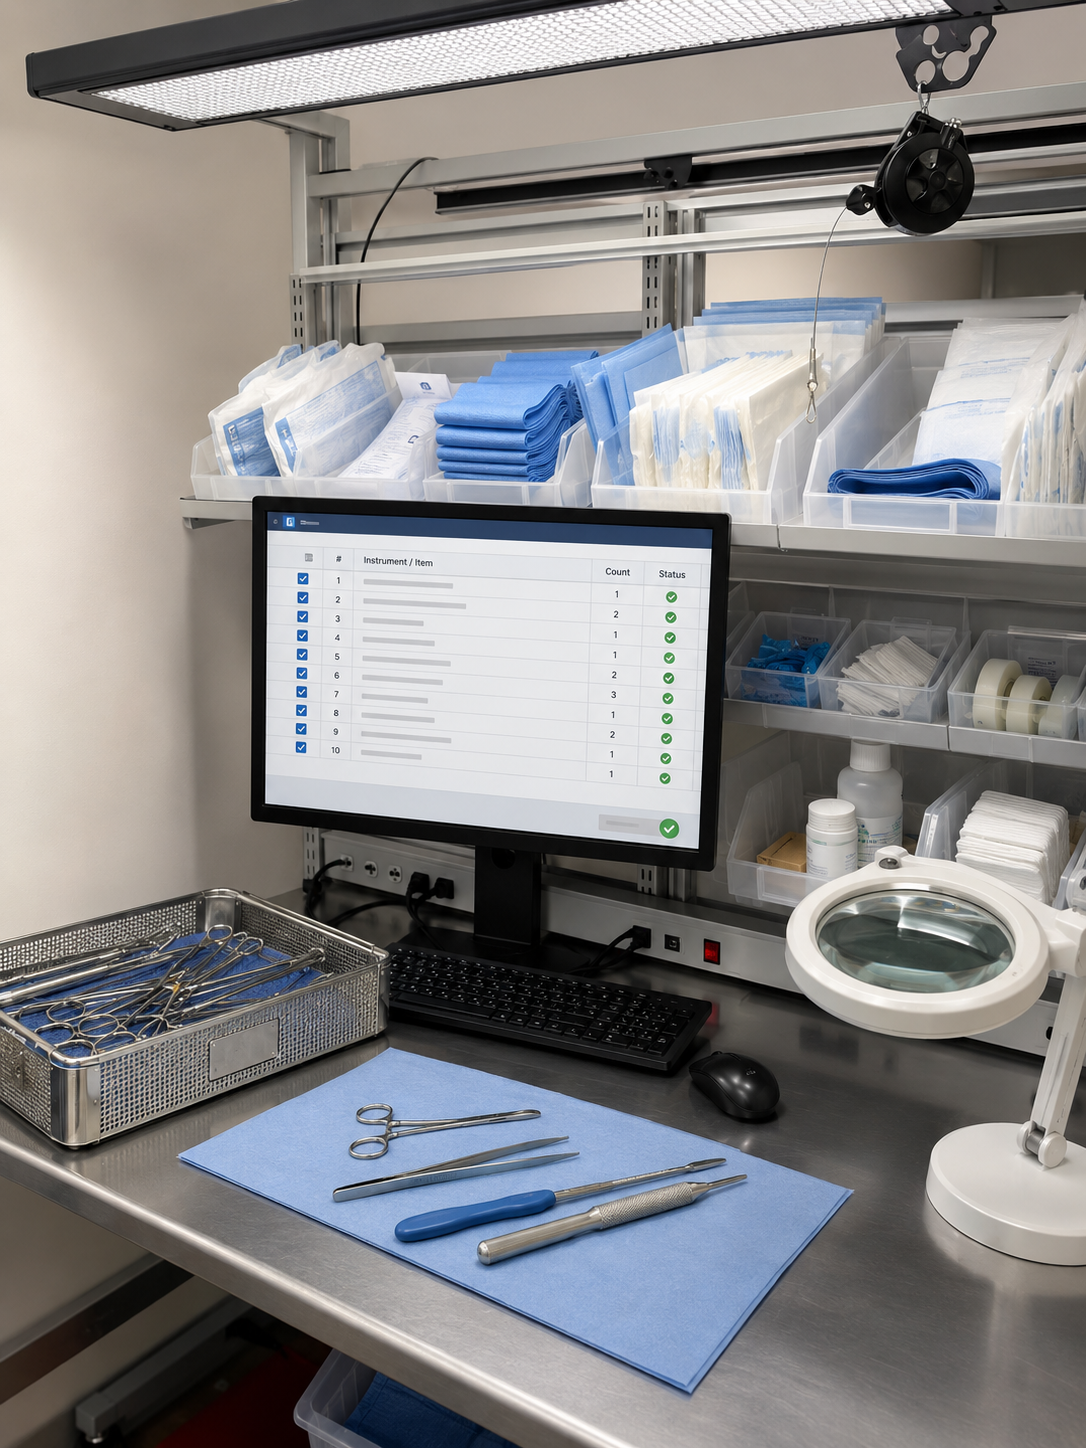
Gather, Plan & Verify
Pre-Assembly Checklist
Why it matters: Beginning assembly without verification creates the highest-risk point for wrong-item and missing-item errors. Every instrument must be confirmed clean, dry, and present before the first item touches the tray.
Retrieve the current, approved count sheet for the specific tray or set being assembled. Confirm it is the most recent version.
Gather all required instruments from their designated storage locations. Do not substitute items or work from memory.
Confirm every item is present, complete, clean, and visually dry before placing it on the assembly workstation.
If any item is missing or questionable, resolve the discrepancy before beginning — do not proceed with an incomplete set.
Inspect & Test Each Item
Functional Verification Before Assembly
Why it matters: Inspection catches problems before sterility is applied. A single contaminated or damaged instrument reaching the sterile field can cause patient harm and regulatory violations. Inspection is not a formality — it is a patient safety checkpoint.
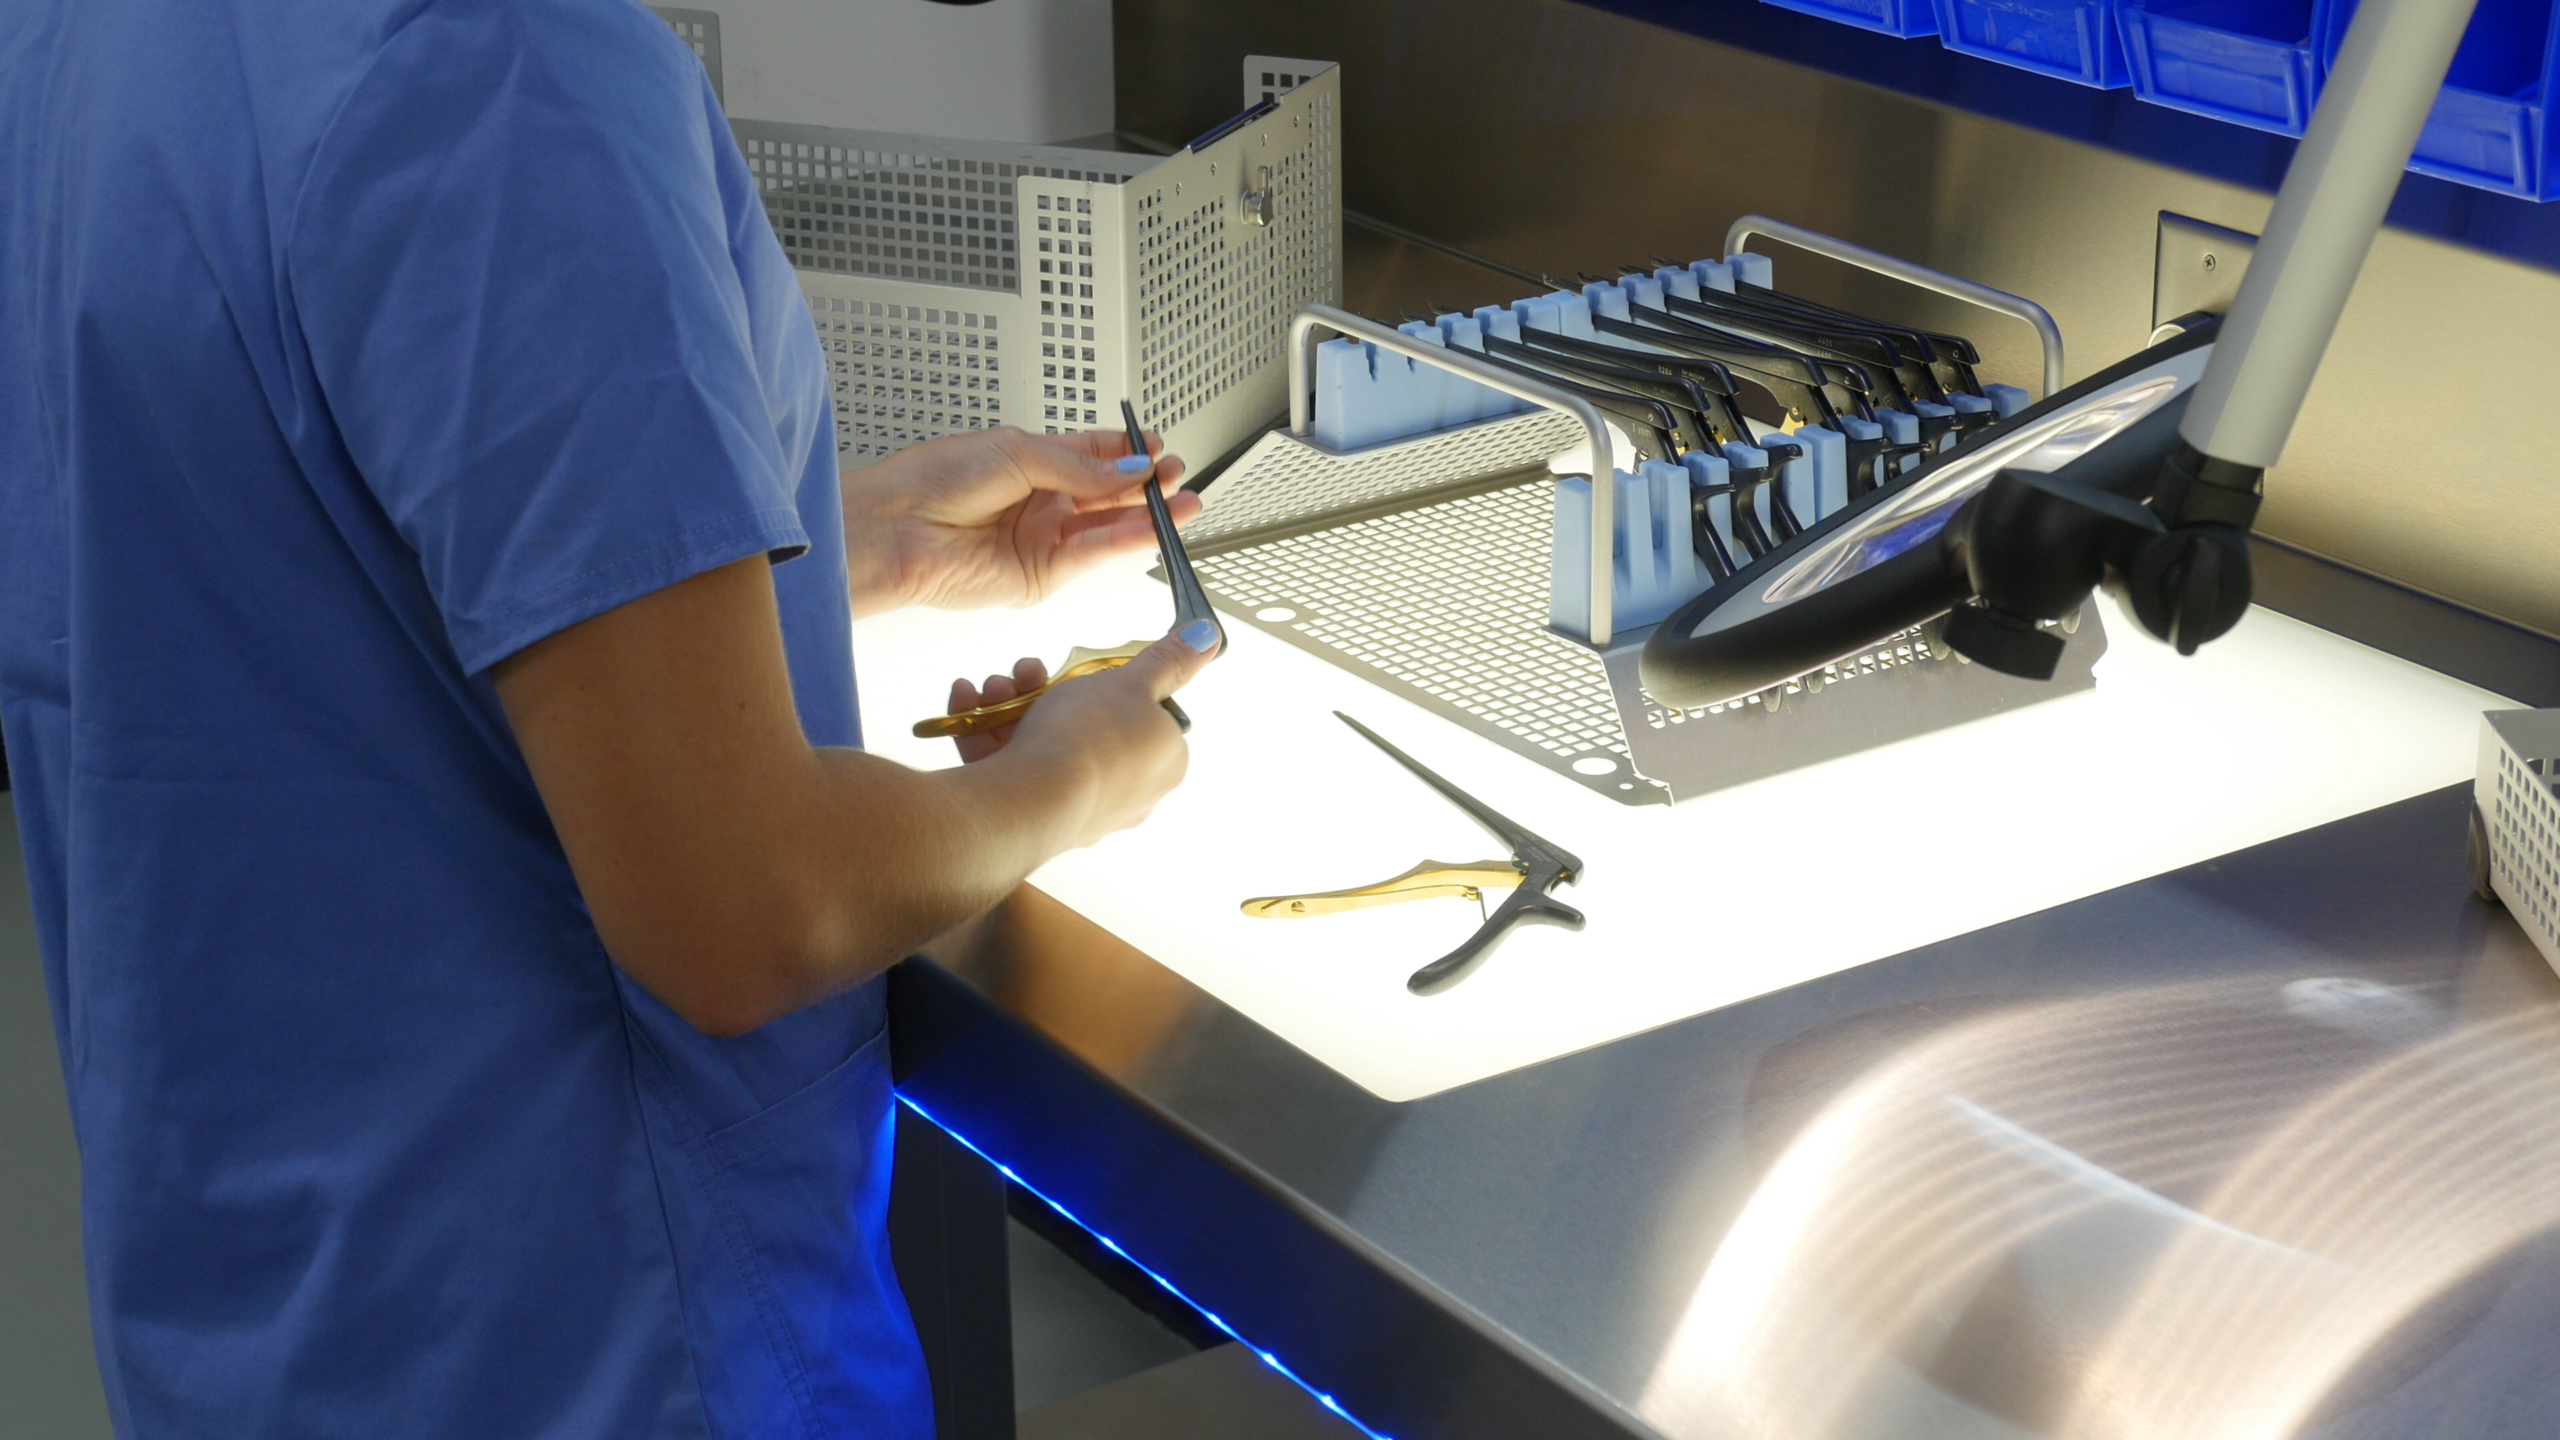
Inspect each instrument under magnification or bright task lighting for residual soil, biofilm, pitting, corrosion, cracks, or bent components.
Test hinged instruments (scissors, clamps, needle holders) for smooth action, proper alignment, and secure locking at each ratchet position.
Check multi-part instruments to confirm all components are present and properly mated. Verify lumens are patent using a stylet or light.
Inspect serations, box locks, and any crevice areas that are high-risk for soil retention. Any failed item must be removed and quarantined for repair or replacement.

Arrange for Sterilant Contact
Open, Disassemble, Separate
Why it matters: Sterilant (steam, EO, hydrogen peroxide) must contact every surface of every instrument to achieve sterilization. Any surface shielded by a closed joint, assembled cavity, or stacked concave instrument remains a potential reservoir for viable microorganisms.
Open all hinged instruments (scissors, clamps, forceps, retractors) to the unlocked position. Sterilant cannot penetrate a closed box lock.
Disassemble all multi-part devices and power tools per the manufacturer's IFU. Reassembly occurs at the sterile field, not in the assembly area.
Separate nested concave items (bowls, basins, cups) with at least a 1-inch size difference, or stack with wicking material between them to prevent pooling and air entrapment.
Protect sharp tips with tip protectors, silicone caps, or designated holders. Contain loose small parts in mesh or gauze pouches.
Arrange by Weight & Protect Delicates
Loading Order and Instrument Positioning
Why it matters: Incorrect loading damages instruments, creates sterilant-contact shadows, and produces wet loads from blocked drainage. A well-loaded tray also enables efficient, safe use at the sterile field — no instrument should be buried beneath another.
Place heaviest and most robust instruments on the bottom of the tray, in positions that allow drainage toward the tray floor.
Position delicate and sharp instruments (scissors, ophthalmic instruments, micro instruments) on top or in dedicated protective holders or silicone mats.
Do not overcrowd. Every instrument must have adequate clearance for sterilant circulation. If a tray is too full, split it into two trays.
Group instruments of the same type together in a logical, repeatable arrangement that mirrors the count sheet and supports emergency access at the sterile field.
Place Internal CI & Wicking Material
Chemical Indicator Placement
Why it matters: An internal chemical indicator (CI) is the only physical record that sterilant conditions were achieved inside the package. Placement in the wrong location produces a passing result even when sterilization failed. This is the most commonly cited CI error in accreditation surveys.
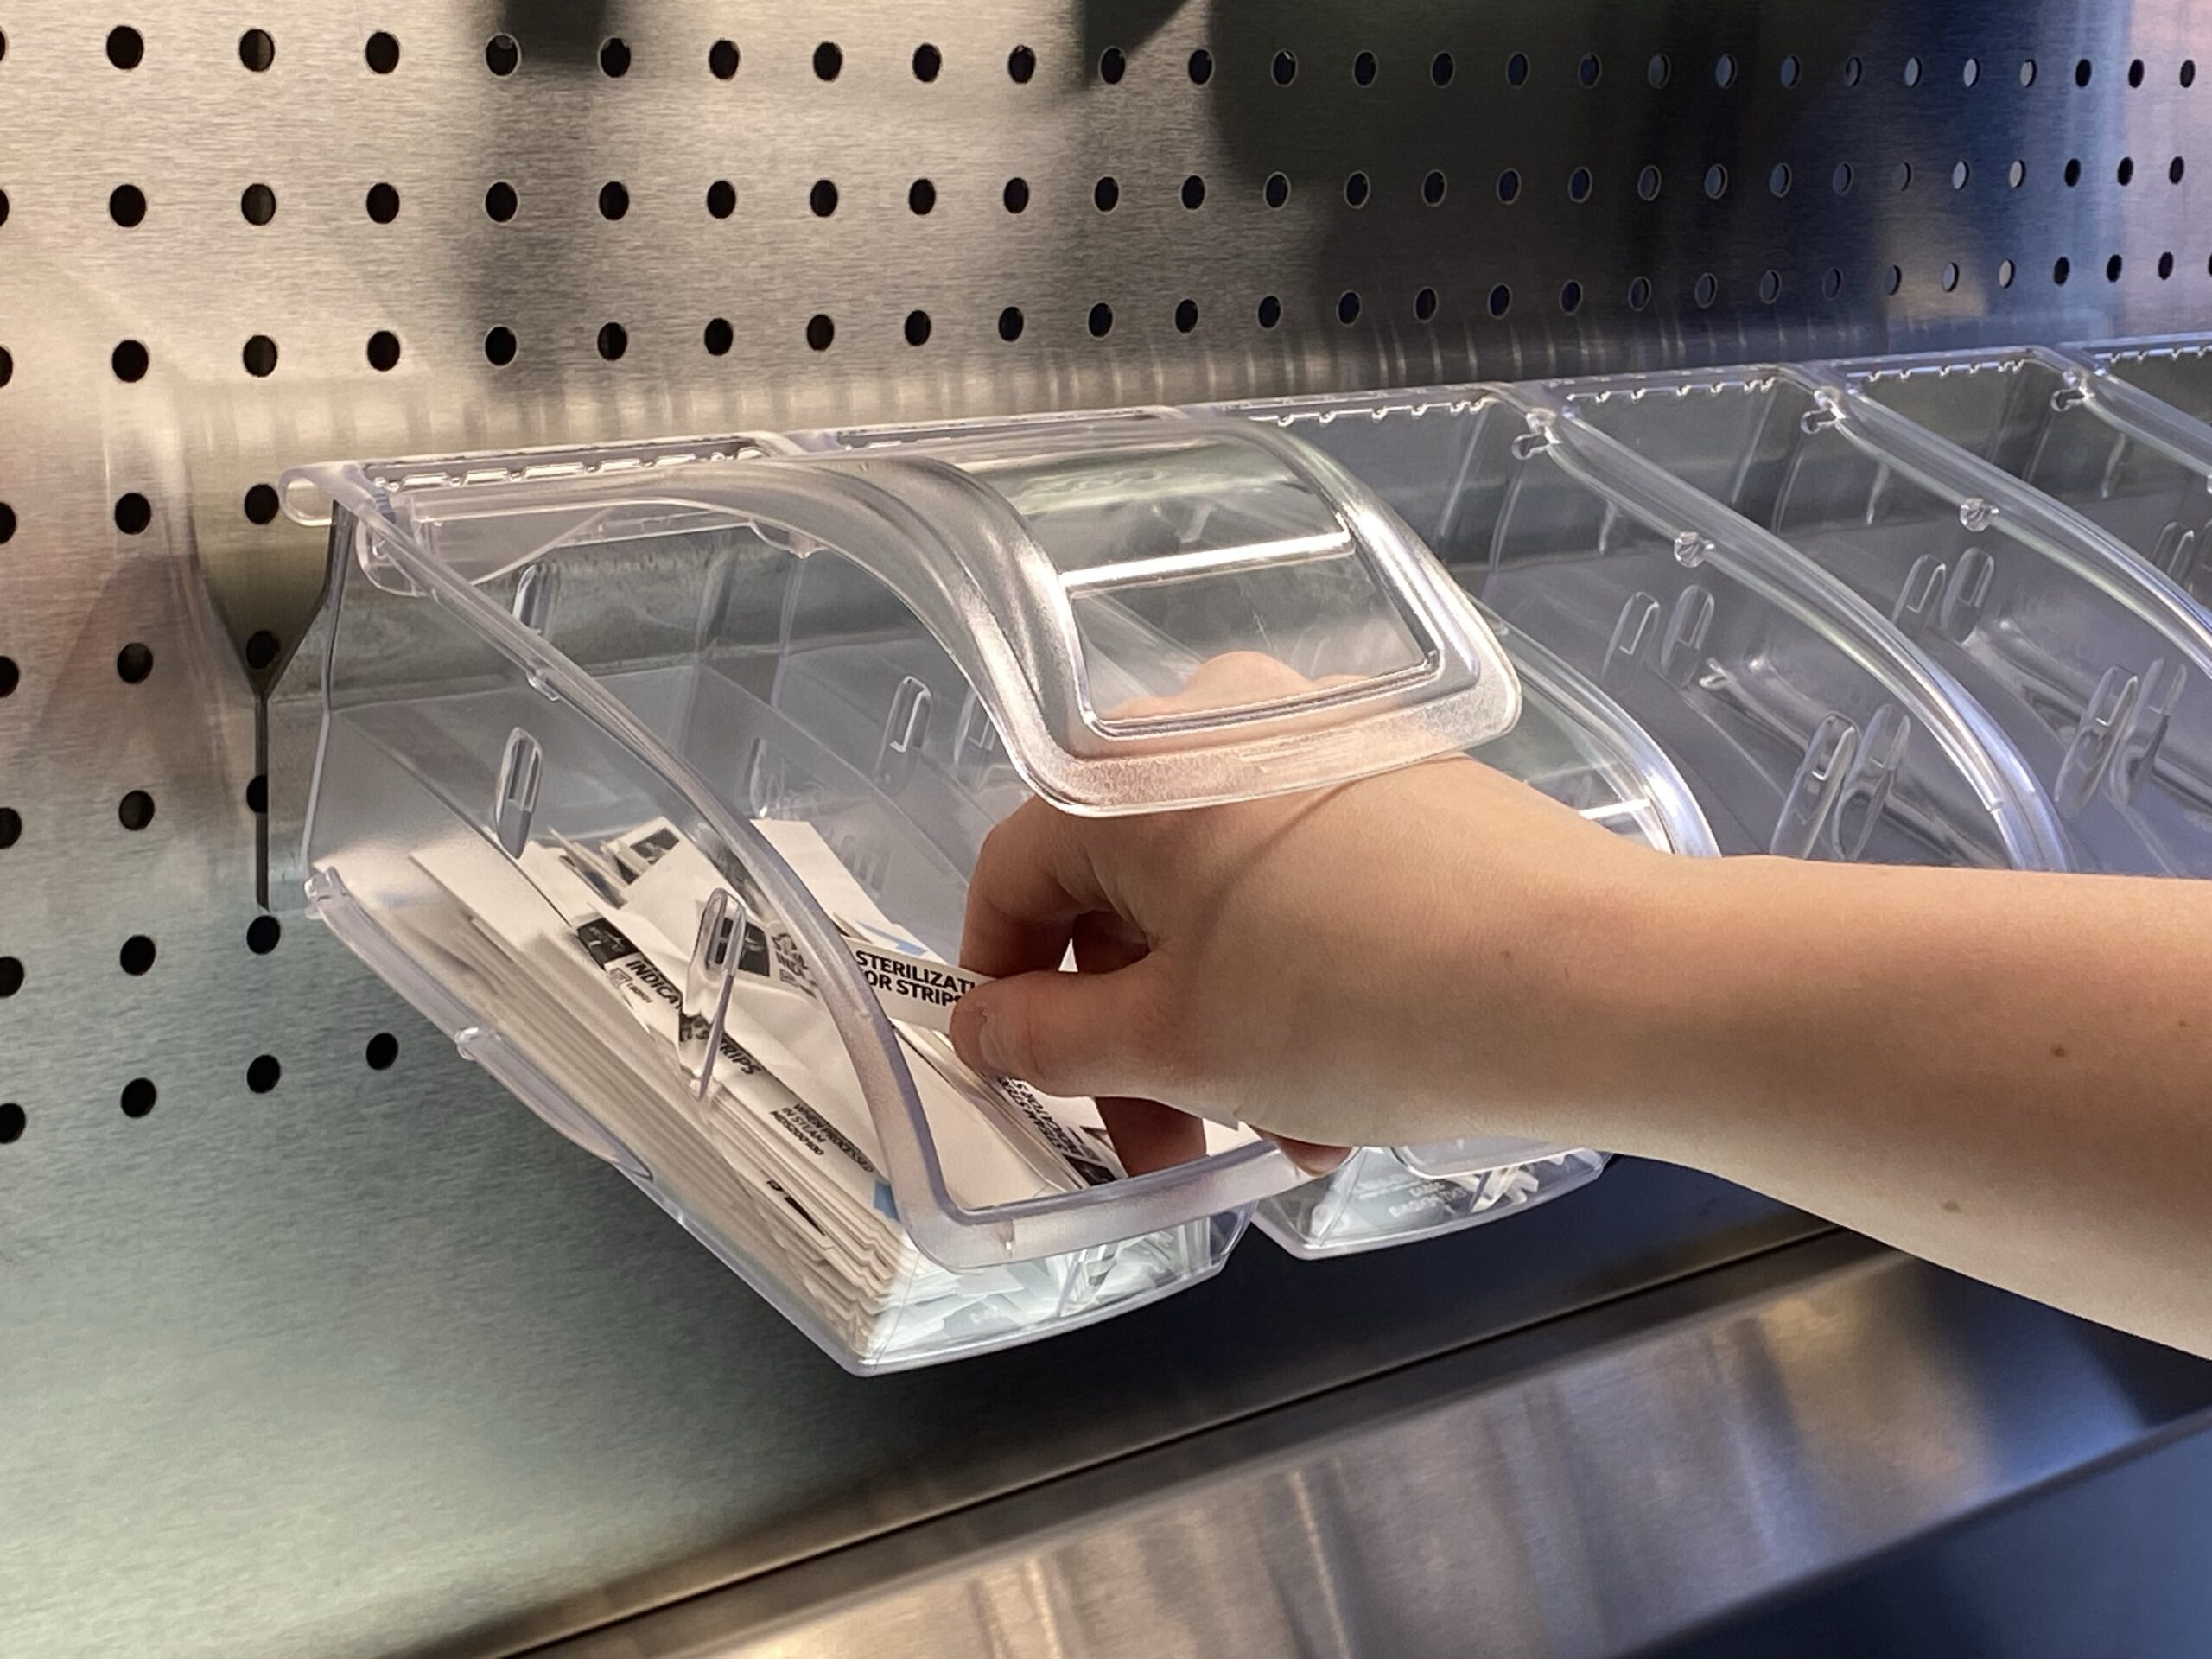
Place at least one Class 5 or Class 6 internal CI in the challenge position for every package — typically the center of the tray at the lowest point, farthest from the sterilant entry point.
For multi-level trays or container systems with insert trays, include at least one CI per level. Each level must be independently verified.
Position the CI so it is visible and legible to the person opening the package at the sterile field without requiring disturbance of the instruments.
Add wicking material (approved absorbent towel or liner) as specified in the container IFU to absorb condensate and prevent wet loads.
Verify Weight & Tray Limits
Load Compliance Verification
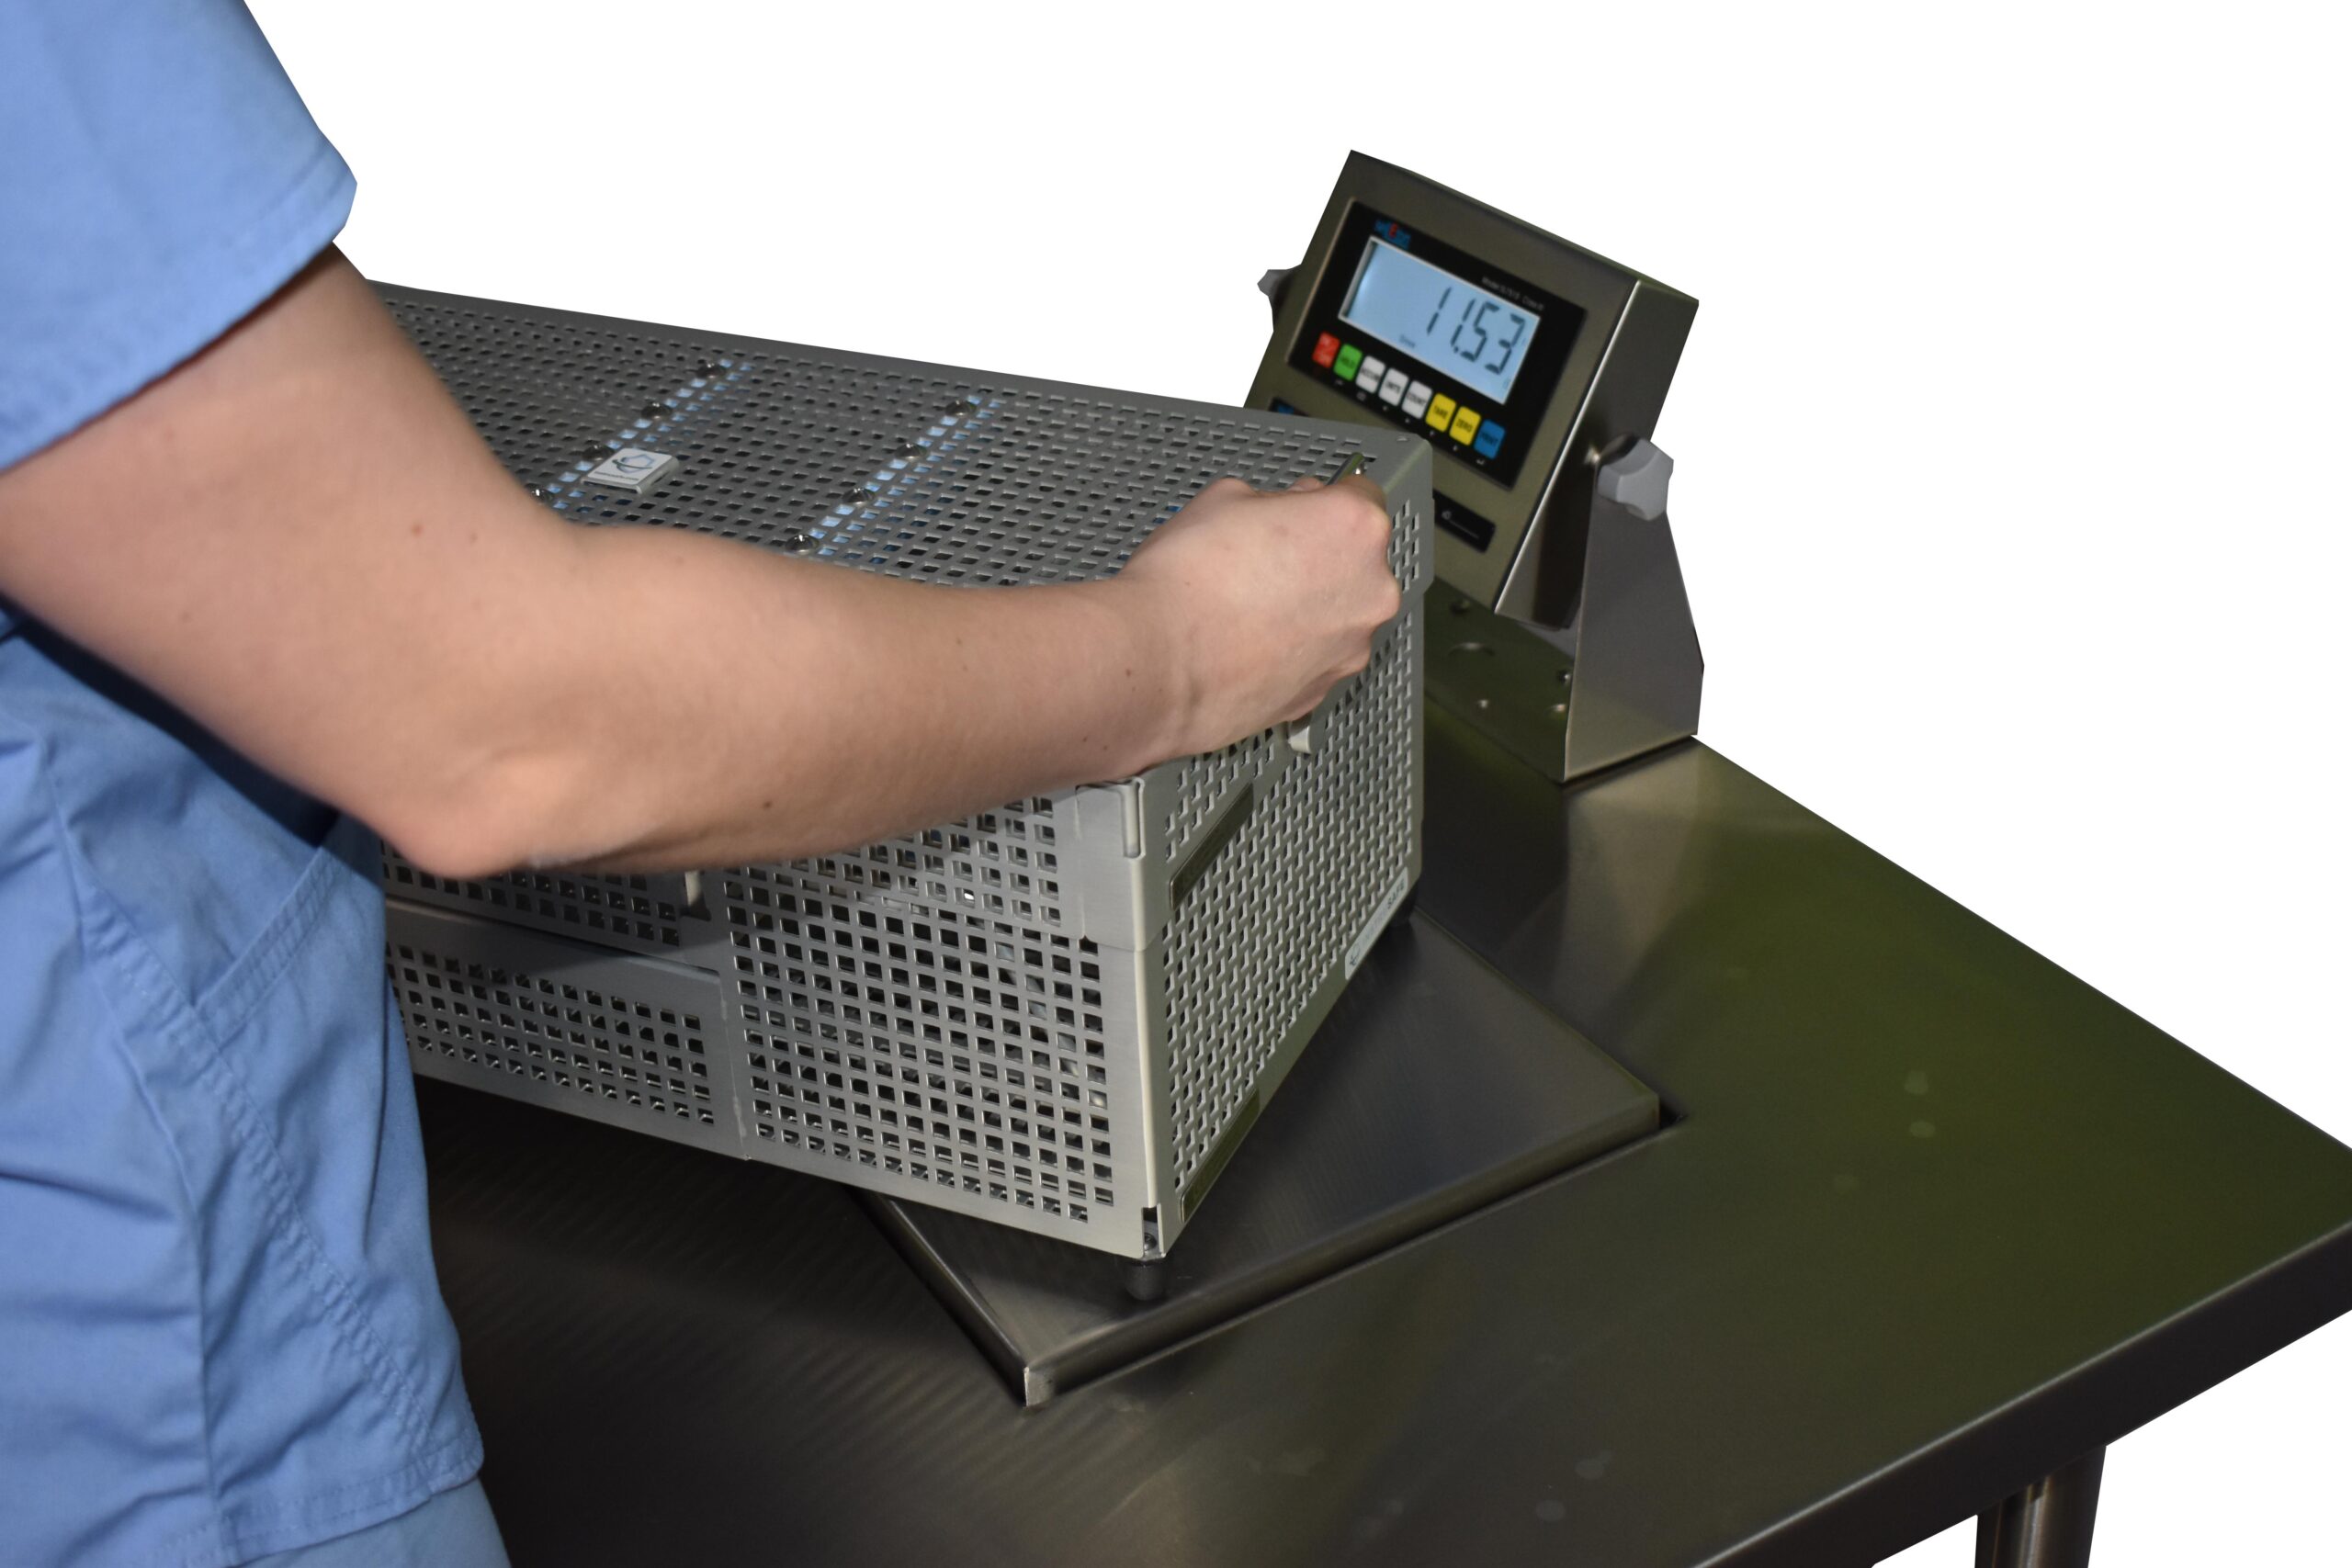
Why it matters: Overweight trays compromise sterilization efficacy (dense loads resist steam penetration), increase needlestick risk (instruments shift and poke through wrapping), and violate AAMI standards. The weight limit exists because it is the validated maximum at which complete sterilant contact has been demonstrated.
Weigh all containerized sets (container + all contents, with filters installed): maximum 25 lbs per ANSI/AAMI ST77 and ST79. Record the weight.
Verify linen pack dimensions: maximum 12 × 12 × 20 inches and maximum 12 lbs.
If a set exceeds weight or dimension limits, divide it into two separate, individually labeled sets and document the change on the count sheet.
Never rely on visual estimation or past practice to assess weight — use a calibrated scale at the assembly workstation.
Select Packaging, Close & Label
Packaging Selection and Final Closure
Why it matters: Packaging is the last line of sterility maintenance. The wrong packaging material for the sterilization method, an improperly sealed pouch, or a missing label creates a package that cannot be verified as sterile and cannot be safely used at the sterile field.
Select packaging validated for the intended sterilization method: steam, EO, hydrogen peroxide plasma, or ozone. Never use packaging not cleared for the method.
Apply an external chemical indicator (CI tape, printed CI, or container CI label) to the outside of every package before closure.
Close the package using the correct method: heat-seal with a validated sealer at the correct temperature and dwell time, self-seal per pouch IFU, or apply the tamper-evident container closure per container IFU.
Apply a complete package label — sterilizer number, cycle number, date, load number, and technician initials — to every package before it leaves the assembly area.
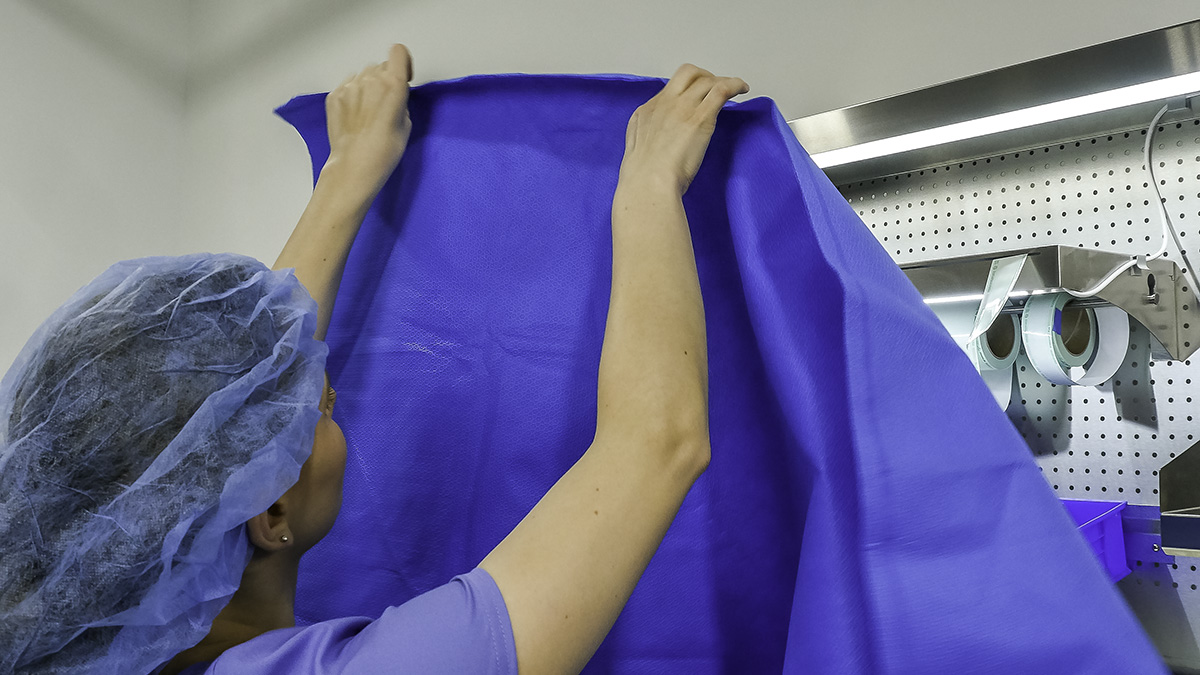
Handle & Transport to the Sterilizer
Pre-Sterilization Transport and Conditioning
Why it matters: Packaging materials that have not reached thermal and humidity equilibrium release moisture during the sterilization cycle, producing wet loads. A wet load is an unacceptable load: the packaging is compromised, the sterility cannot be assured, and the contents must be reprocessed.
Store all packaging materials (pouches, wrap, container filters) in the assembly area at 68°F–73°F and 30%–60% relative humidity for a minimum of two hours before use.
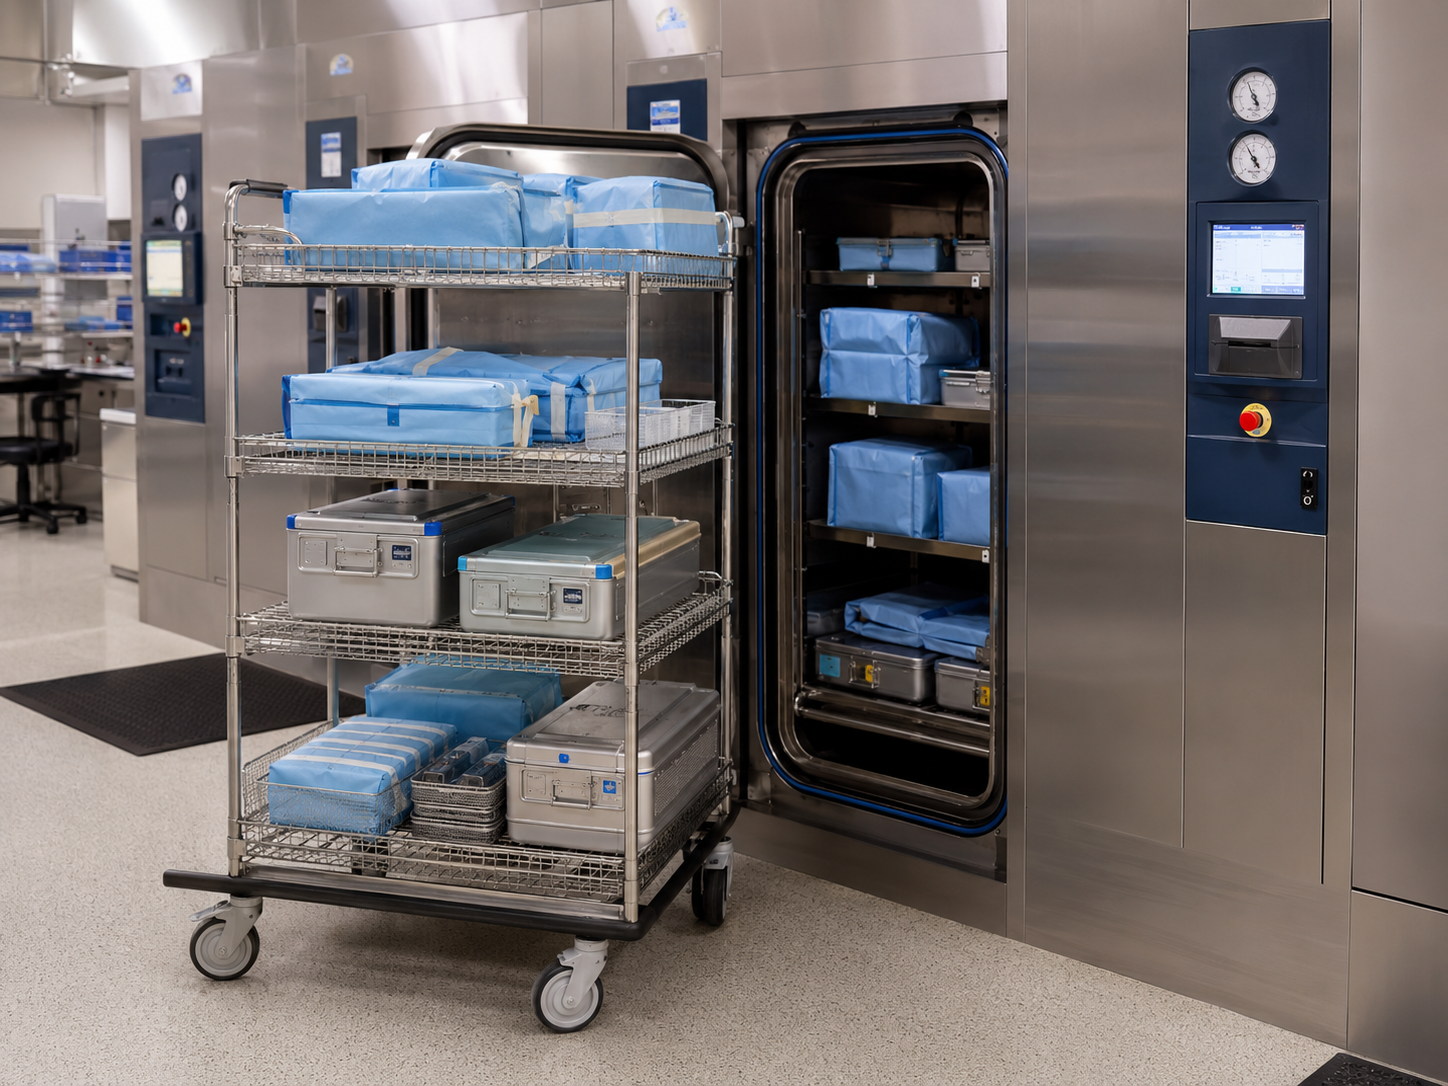
Transport packaged sets on a dedicated clean cart. Place packages flat, or per the packaging manufacturer's IFU (some pouches are loaded on edge).
Protect packages from compression, moisture, physical damage, and contact with soiled items during transport to the sterilizer.
Do not stack packages in a way that compresses or deforms the packaging. Load the sterilizer according to the validated loading pattern.
Inspection: The Critical Checkpoint
Every item must be inspected before assembly. Not most items. Not items that "looked clean" in the washer. Every item, every cycle, with deliberate attention to the locations where contamination and damage most commonly hide. ANSI/AAMI ST79 requires inspection of all items before packaging.5
If a soiled item is found during assembly, return the ENTIRE tray to decontamination. The tray the soiled instrument was in should also return, as other instruments may have been contaminated through contact. Do not attempt to clean an instrument in the assembly area. Doing so may contaminate the immediate area and may cross-contaminate other areas of the department. (ANSI/AAMI ST79; HSPA, 8th ed.)
Cleanliness Check
Examine each instrument under adequate task lighting and magnification. Inspect specifically:
Damage Check
Function Testing by Instrument Type
Scissors
Test using approved test material (red sharpness paper or synthetic test medium). The scissors should cut cleanly without tearing or deflecting. Do not test on fingernails, gloves, or gauze — these are not validated methods.
Ratcheted Instruments (Clamps, Needle Holders)
Verify the ratchet engages and holds at each position without slipping. Jaws should close evenly and meet uniformly along their full length. Test needle holders at first ratchet position — the instrument should not release spontaneously.
Electrosurgical Instruments
Insulation integrity must be tested between every reprocessing cycle using an approved insulation tester.4 Visual inspection alone cannot detect micro-defects that cause unintended tissue injury. Do not return an unverified electrosurgical instrument to a tray.
Multi-Part and Complex Instruments
Reassemble and test for proper function, then disassemble again per IFU for sterilization.4 Instruments that do not function correctly when reassembled should be tagged for repair and removed from the workflow.
Every instrument that fails inspection or function testing must be tagged and physically removed from the assembly area before the tray is completed. A tagged instrument should not return to a tray until repaired, resharpened, or replaced and re-verified as functional.4
Packaging Selection: Matching Method to Mission
Packaging is not just a wrapper — it is the sterility barrier that must perform reliably from the moment sealing is complete through the moment it is opened at the sterile field. Selecting the wrong packaging system for a given sterilization method, load configuration, or storage duration is a quality and patient safety failure, even if the package appears intact on the outside. ANSI/AAMI ST77 and ST79 define the standards governing packaging system validation, selection, and use.4,5
Three Objectives of Any Packaging System
Peel Pouches
Peel pouches combine a plastic film (clear) side with a paper or Tyvek (opaque) side. They are appropriate for single instruments, small sets, or items that require visual inspection through the packaging. Key rules:
Rigid Sterilization Containers
Rigid containers offer the highest physical protection and are reusable across cycles. They are validated by the manufacturer for specific sterilization methods and cycle parameters. The assembly must follow IFU precisely: gaskets, filters, latches, and indicator placement all affect performance. Challenge testing should be conducted per the container manufacturer’s protocol when the container is new to a facility or after any modification.
Flat Wraps: Sequential vs Simultaneous
Compatibility at a Glance
| Packaging Type | Steam | EtO | H₂O₂ | Ozone |
|---|---|---|---|---|
| SMS/SMS Non-woven | ✓ | ✓ | ✓ | ✓ |
| Paper/Plastic Peel Pouch | ✓ | ✓ | ✗ | ✗ |
| Tyvek/Plastic Peel Pouch | ✗ | ✓ | ✓ | ✓ |
| Woven (Muslin) | ✓ | ✗ | ✗ | ✗ |
| Rigid Container | ● | ● | ● | ● |
● = per container IFU; verify manufacturer compatibility before use
Sterility Assurance & Labeling
A sterile package is only as reliable as the process that created it and the information that travels with it. Chemical indicators document that a package was exposed to the sterilization process. Labels ensure that every package can be tracked, traced, and identified at point of use — without having to open it. Together they form the traceability and accountability backbone of the sterile processing workflow.
Chemical Indicator Requirements
Every package must contain an internal chemical indicator (Class 5 or higher) that documents exposure to the sterilization process. An external indicator is also required on the outside of the package when the internal one is not visible through the wrapper or container.5
CI Placement
Place internal CIs in the area of the package with the greatest sterilant challenge — generally the geometric center of a wrapped tray or the most densely packed area of a container. For complex instruments with lumens, place a CI at the distal end of the longest lumen where sterilant penetration is most difficult to achieve.
Point-of-Use Sterility Checks
Required Label Elements
ANSI/AAMI ST79 and accrediting body standards require specific information on every package label. Labels must be legible, permanent, and applied in a manner that does not compromise the packaging.4,5 Required elements include:
Incomplete Trays & Event-Related Sterility
If an item is missing from a tray, document it on the count sheet and package label. Do not leave substituted items unlabeled or loose in the tray. Event-related sterility means a sterile package remains sterile until an event compromises the package barrier — not until a calendar date. Facilities using event-related sterility must have a written policy defining what constitutes a compromising event and the response procedure.4
Process Challenge Devices (PCDs): Each sterilizer load must include a PCD appropriate to the load type — wrapped/flat wrap, rigid container, or implant. PCDs are placed in the most challenging location in the sterilizer chamber. The load may not be released for use until the PCD BI (if used) result is negative and the CI result has passed.5
Considerations for Sterilization
Assembly and packaging decisions directly affect sterilization outcomes. The technician assembling a tray is making real-time decisions about load configuration, weight distribution, and material compatibility — decisions that influence whether the sterilant can reach every surface and whether the packaged load emerges as intended.
Moisture & Wet Pack Prevention
Wet packs after steam sterilization represent a sterility assurance failure. Moisture on or inside the package at the end of the cycle creates a pathway for microbial wicking — the ability of bacteria and spores to migrate through a wet packaging barrier. Even a visually damp wrapper must be considered compromised and reprocessed.5
Assembly choices that reduce wet pack risk:
Density, Weight & Drainage
Tray density and weight have direct implications for sterilization efficacy. Overloaded trays impede steam penetration and extend the time required to reach minimum temperature at all surfaces. AAMI ST79 recommends that instrument sets not exceed 25 pounds (11.4 kg) — though many facilities and manufacturers specify lower limits.5
Loading Configuration Reminder
Basin sets must be placed on edge (not flat) to allow condensate to drain and air to evacuate. Mixed tray types require validation to confirm that drying is adequate across the entire load. When in doubt, consult the sterilizer manufacturer’s loading chart and the IFU for the most complex item in the load.
Environment & Facility Requirements
The preparation and packaging area is a controlled environment. This is not a courtesy designation — it is a functional requirement for sterility assurance. Temperature, humidity, airflow, lighting, traffic, and attire must all meet defined parameters, and those parameters must be monitored, documented, and acted upon when they fall out of range.
Temperature & Humidity
ANSI/AAMI ST79 specifies 68–73°F (20–23°C) and 30–60% relative humidity (RH) for the prep and pack area.5 These limits exist for specific reasons:
Temperature and humidity must be recorded and documented at least daily. Readings outside the acceptable range require immediate investigation and corrective action — not simply continued operation while the investigation is pending.
Lighting
Minimum illumination for the prep and pack area is 50 foot-candles (540 lux) at the work surface. Inadequate lighting is a direct contributor to missed soiling, damage, and assembly errors. Overhead lighting supplemented by task lighting at each assembly station is the recommended configuration. LED task lights with daylight-spectrum bulbs (5000–6500K) provide the best contrast for detecting soiling and defects.
Airflow & Positive Pressure
The prep and pack area must be maintained at positive pressure relative to the decontamination area and corridors. Positive pressure prevents air from the decontamination zone (which contains aerosolized bioburden) from flowing into the clean assembly area. ANSI/AAMI and FGI guidelines specify a minimum of 10 ACPH (air changes per hour) for prep and pack areas — and at least 2 of those must be outside air exchanges.
Lint & Particulate Control
Lint and particles are a persistent contamination risk in the assembly area. Lint can carry viable microorganisms and can occlude instrument surfaces during final inspection. Sources of lint in the prep and pack area include:
Traffic & Dress Code
Access to the prep and pack area should be restricted to authorized personnel. Visitors must follow the same dress code as staff. Facility policy should define attire requirements: freshly laundered scrubs, head covering, clean footwear or shoe covers, and no personal jewelry that cannot be sanitized. Food, drink, and personal items are not permitted in the work area.
Risk Assessment in Prep & Pack
Every decision made in the prep and pack workflow carries risk. Some risks are clinical — a missed defect that causes injury. Some are operational — a mislabeled tray that delays a procedure. Some are regulatory — a documentation gap that triggers a finding during survey. Understanding and actively managing these risks is what separates a compliant department from an excellent one.
01
Incomplete Decontamination Entering Prep Area
Contaminated items passing the clean/dirty threshold undermine all downstream inspection. Enforce workflow segregation and never allow "shortcut" transfers.
02
Soiled Instrument Assembly Without Detection
Inadequate lighting and magnification are the primary failure modes. Ensure task lighting meets the 50 foot-candle minimum and magnification is in use for all fine-detail inspection.
03
Defective Instrument Reaching the Patient
Function testing is not optional. Every instrument has a defined test method — scissors, ratchets, needle holders, and insulated instruments each require specific testing before packaging.
04
Packaging Method Incompatible with Sterilization
Paper/plastic pouches in H&sub2;O&sub2; cycles, or steam peel pouches for heat-sensitive items, result in failed sterilization or packaging breach. Maintain packaging-sterilization compatibility reference guides.
05
Seal Failure from Overloaded Pouches
A pouch overstuffed beyond its designed capacity stresses the peel seal. Pressure from the instrument against the seal during drying or handling creates micro-tears or complete delamination.
06
Label Information Errors
Illegible, incomplete, or incorrect labels disrupt traceability and may result in wrong items being delivered to procedures. Barcode-based labeling and automated verification reduce but do not eliminate this risk.
07
Wrong or Absent Chemical Indicator
Missing internal CIs mean the package cannot be verified at point of use. CIs from another sterilization method may not react to the sterilant used, producing a false pass.
08
Environmental Control Failures
Out-of-range temperature or humidity that is not detected or acted upon compromises packaging material performance and increases contamination risk. Monitoring without response is not monitoring.
09
IFU Non-Compliance
Deviating from manufacturer IFU — using a different sterilization cycle, wrapping method, or water quality than specified — voids the manufacturer’s sterility assurance claim and creates unvalidated conditions.
10
Untrained or Inconsistently Trained Staff
Personnel variation is the greatest source of process variability. Standardized procedures, documented competency verification, and certification requirements reduce but require active management to maintain.
Common Failures & Troubleshooting
Failures in the prep and pack phase are almost always traceable to a specific deviation from standardized practice. Most are preventable. The following are the most frequently encountered failure modes, their root causes, and corrective actions.
Competency & Training
Sterile processing is a skilled technical discipline. Its outcomes — whether patients receive sterile, functional, complete instrument sets — are largely determined by the consistency and expertise of the people performing the work. High-performing SP departments treat training as a continuous operational priority, not a one-time onboarding checkbox.
Why Training Drives Quality
Most quality failures in sterile processing are not equipment failures. They are human performance failures — a missed defect, a packaging shortcut, a documentation error. These failures follow predictable patterns: they cluster around task complexity, time pressure, fatigue, and process ambiguity. Well-designed training and competency verification address each of these factors systematically.
Research published in AORN Journal and presented at HSPA conferences consistently shows that facilities with higher rates of CRCST-certified technicians experience fewer surgical site infections attributable to instrument sterility events, fewer wrong-count events, and lower rates of package integrity failures.
CRCST & CSPDT Certification
The Certified Registered Central Service Technician (CRCST) credential from HSPA is the standard certification for sterile processing technicians. Many state health codes and accrediting bodies now require or formally incentivize CRCST certification as a baseline qualification. The Certified Sterile Processing and Distribution Technician (CSPDT) from CBSPD represents an equivalent alternative credential pathway recognized by CMS and major accreditors.
Initial Competency Verification
New staff must demonstrate competency before performing any task independently. Initial competency assessment should cover all core functions of the role, including inspection, function testing, assembly, packaging selection, sealing, and labeling. Observation by a qualified preceptor, with documentation on a standardized competency form, is required before independent practice begins.
Ongoing Competency
Annual competency re-verification is the minimum standard. High-performing departments implement ongoing quality monitoring that generates real-time competency data — tracking defect rates by technician, identifying patterns, and triggering targeted retraining before events escalate. The following monitoring methods support ongoing competency management:
Standardized Procedures
No training program can substitute for written procedures that define the expected standard for every task. Tray assembly cards, written SOPs for each packaging method, and documented sealer maintenance logs remove ambiguity and provide the reference standard against which competency is measured. These documents must be reviewed and updated when standards, equipment, or instrument inventory change.
Frequently Asked Questions
Sequential wrapping (also called series or envelope wrapping) uses two sheets individually — the item is wrapped in the first sheet, then that wrapped package is wrapped again in the second sheet, creating two independent sterility barriers. Simultaneous wrapping layers both sheets together and wraps them at the same time, creating a single unified barrier. Sequential wrapping is required when independent aseptic presentation of an inner wrap is needed — for example, when a sterile field requires a second peel at the OR table. Simultaneous wrapping is appropriate for standard instrument sets that do not require this additional aseptic transfer capability. Consult your facility policy and the IFU for the specific wrap material being used.
Only if the substitute instrument is listed as an acceptable equivalent on the tray's assembly card and has been verified as clean, functional, and appropriate for the sterilization method. Do not add items that are not validated as equivalent substitutes. If an item is missing and no validated substitute is available, document the missing item on the count sheet, note it on the package label, and consider whether the procedure can proceed safely with the incomplete set. Never silently substitute or leave an item out without documentation — both create patient safety and traceability risks.
A passed heat seal is complete, continuous, and shows no visible gaps, channels, peel-back, or wrinkles along the entire sealed edge. The sealed area should be uniform in color change (if the seal tape is CI-type). When you gently press the sealed area between thumb and forefinger along its full length, there should be no give or separation. Any visible channel (a line where the seal did not bond) is a failure — even if only 2–3mm long. A channel is a direct pathway for microbial wicking into the package interior. Reject and reprocess.
Instruments must be disassembled before sterilization whenever the manufacturer's IFU specifies disassembly, when the instrument has removable components (handles, inserts, screws, valves), or when assembled configuration would prevent sterilant contact with internal surfaces. Complex instruments like laparoscopic trocars, multi-part retractors, and modular implant systems typically require complete disassembly. Even if a technician believes an instrument can be sterilized assembled, the IFU governs — not experience-based assumption. If no IFU is available, contact the manufacturer directly.
Stop assembly immediately. Do not attempt to clean the instrument at the assembly workstation — doing so may contaminate the surrounding area and other instruments. The soiled instrument must be returned to decontamination. The entire tray being assembled must also be returned, as instruments in contact with the soiled item may have been cross-contaminated. Document the event including the tray name, instrument involved, and the time of discovery. Report to your supervisor. Investigate whether the instrument went through a complete decontamination cycle and whether the washer/disinfector performed normally for that load.
Sterility is event-related, not time-related — this is the current evidence-based and AAMI/AORN-endorsed position. A sterile package remains sterile until an event compromises its packaging barrier: a tear, puncture, wet wrap, compression damage, broken seal, or other physical integrity failure. The practical implication is that if a package has been stored properly (closed cabinet, climate-controlled area, no physical stress) and the packaging is intact, it is considered sterile regardless of when it was processed. However, your facility may have a date-related expiration policy for regulatory or accreditation reasons. Follow your written facility policy, and ensure any date printed on the label matches that policy.
No. Paper-based packaging is not compatible with hydrogen peroxide (H₂O₂ plasma/vapor) sterilization. The paper absorbs hydrogen peroxide and prevents adequate sterilant penetration, resulting in an incomplete cycle and potential cycle abort. Peel pouches for H₂O₂ sterilization must use Tyvek (spunbonded polyolefin) as the breathable side — not paper. Verify that the pouch packaging states compatibility with the specific sterilization method you are using. This information is also available in the sterilizer and pouch manufacturer IFUs.
FAN stands for Functionality, Appropriateness, and Numbers. It is a simple verification framework used during instrument tray assembly to confirm that every instrument is: (F) Functional — the instrument works as intended and has passed inspection and function testing; (A) Appropriate — the instrument is the correct item for the tray, matches the count sheet, and is suitable for the sterilization method being used; and (N) Numbers — the count of instruments matches the tray card exactly, with no extras or missing items. Applying the FAN principle systematically at every tray, every time, reduces count errors, substitution errors, and assembly omissions.
Use approved commercial scissor test material — typically a yellow or red rubber test medium or a synthetic test card supplied by the scissors sharpness testing manufacturer. Hold the scissors at the tip (not the handle) and draw the test medium through the blade from the heel to the tip in a single smooth motion. The scissors should cut cleanly without tearing, fraying, or deflecting. Do not test on gloves, gauze, suture, fingernails, or paper — these are not validated test methods and will not produce consistent results. If scissors fail the sharpness test, tag them for resharpening and remove from the assembly workflow.
ANSI/AAMI ST79 specifies 68–73°F (20–23°C) and 30–60% relative humidity (RH) for the preparation and packaging area. These parameters must be monitored and documented at least daily. Out-of-range readings are not simply a documentation issue — they require investigation and corrective action because both temperature extremes and humidity outside the specified range can degrade packaging material performance, affect adhesive seals, and increase contamination risk from static or moisture. Readings and corrective actions must be documented in your department's environmental monitoring log.
Only if specified in the implant manufacturer's IFU or your facility's implant processing policy. Double-pouching is sometimes required when the outer package is opened in a non-sterile area (e.g., a storage room) and the inner package needs to be maintained sterile for transfer to the sterile field. However, unnecessary double-pouching creates risks: it can impede sterilant penetration, make aseptic presentation harder, and increase the seal failure rate by adding stress to the inner pouch during the outer peel. Do not double-pouch unless it is required by the IFU or a validated facility protocol. When double-pouching is required, size both pouches appropriately — the inner pouch must fit in the outer pouch with at least 1 inch of clearance on all sides.
Raising the Standard in Every Tray
Preparation and packaging is not the glamorous end of sterile processing. It does not involve the visible drama of the decontamination bay or the decisive moment of sterilizer release. But it is the discipline’s most consequential phase. Every tray that leaves the prep and pack area carries the accumulated quality of every decision made by the technician who built it — whether the inspection was thorough, whether the function test was real, whether the packaging was right, whether the documentation was complete.
The standards covered in this guide — ANSI/AAMI ST79, ST77, HSPA’s Central Service Technical Manual, AORN guidelines, and the regulatory frameworks of TJC, CMS, and state health codes — exist because this work has failed before. Patients have been harmed. Infections have followed inadequately reprocessed instruments into sterile fields. That history is not abstract: it is the foundation on which every standard in this guide was built, and the reason compliance is not optional.
The path to excellent prep and pack outcomes is not mysterious: standardized procedures, documented competency verification, environmental monitoring, quality assurance audits, and a culture where technicians feel empowered to stop and report rather than proceed with a concern unaddressed. None of these require extraordinary resources. They require leadership commitment and consistent execution.
At Pure Processing, we work with sterile processing departments to identify where that execution breaks down and how to close the gap. Whether the opportunity is in tray standardization, technician training, packaging system optimization, or quality monitoring, we bring evidence-based tools and direct SP experience to the work.
Every tray is a patient. Build it that way.
References
- Association of periOperative Registered Nurses (AORN). Guidelines for Perioperative Practice. Denver, CO: AORN, Inc.; 2024.
- Association for the Advancement of Medical Instrumentation (AAMI). Comprehensive Guide to Steam Sterilization and Sterility Assurance in Health Care Facilities. ANSI/AAMI ST79:2017/(R)2020. Arlington, VA: AAMI; 2020.
- Association for the Advancement of Medical Instrumentation (AAMI). Sterilization of Health Care Products — Packaging for Terminally Sterilized Medical Devices. ANSI/AAMI/ISO 11607-1 and 11607-2. Arlington, VA: AAMI; 2019.
- Association for the Advancement of Medical Instrumentation (AAMI). Flexible and Rigid Sterilization Container Systems for Use in Health Care Facilities. ANSI/AAMI ST77:2013/(R)2022. Arlington, VA: AAMI; 2022.
- Healthcare Sterile Processing Association (HSPA). Central Service Technical Manual. 8th ed. Chicago, IL: HSPA; 2019.
- The Joint Commission. Comprehensive Accreditation Manual for Hospitals (CAMH). Oakbrook Terrace, IL: The Joint Commission; 2024.
- Centers for Medicare & Medicaid Services (CMS). Conditions of Participation: Infection Control. 42 CFR Part 482.42. Washington, DC: CMS; 2023.
- U.S. Food and Drug Administration (FDA). Reprocessing of Single-Use Devices: Guidance for Industry and FDA Staff. Silver Spring, MD: FDA; 2018.
- Rutala WA, Weber DJ; Healthcare Infection Control Practices Advisory Committee (HICPAC). Guideline for Disinfection and Sterilization in Healthcare Facilities, 2008 (Updated 2019). Atlanta, GA: Centers for Disease Control and Prevention; 2019.
- Berrios-Torres SI, Umscheid CA, Bratzler DW, et al. Centers for Disease Control and Prevention guideline for the prevention of surgical site infection, 2017. JAMA Surgery. 2017;152(8):784–791.
- Spruce L. Back to basics: packaging systems. AORN Journal. 2017;105(3):317–327.
- Conner R, Blanchard J. Chemical indicators: selection and use. AORN Journal. 2018;107(4):489–499.
- World Health Organization (WHO). Decontamination and Reprocessing of Medical Devices for Health-Care Facilities. Geneva: WHO; 2016.
- Chinn RY, Sehulster LM; Healthcare Infection Control Practices Advisory Committee (HICPAC). Guidelines for Environmental Infection Control in Health-Care Facilities. Atlanta, GA: CDC; 2003 (Updated 2019).
- Spaulding EH. Chemical disinfection of medical and surgical materials. In: Lawrence C, Block SS, eds. Disinfection, Sterilization, and Preservation. Philadelphia, PA: Lea & Febiger; 1968:517–531.
- AAMI. Chemical Indicators — Part 1: General Requirements. ANSI/AAMI/ISO 11140-1:2014/(R)2019. Arlington, VA: AAMI; 2019.
- International Association of Healthcare Central Service Materiel Management (IAHCSMM). Central Service Leadership Manual. Chicago, IL: IAHCSMM; 2021.
- Occupational Safety and Health Administration (OSHA). Bloodborne Pathogens Standard. 29 CFR 1910.1030. Washington, DC: OSHA; 2023.
- Association for Professionals in Infection Control and Epidemiology (APIC). APIC Text of Infection Control and Epidemiology. 5th ed. Arlington, VA: APIC; 2021.