The Invisible Risk: How Magnetized Instruments Impact Safety
◆ Key Takeaway
Magnetized surgical instruments create an invisible safety hazard, occurring in roughly 38% of microsurgery cases and causing sharps injuries, tissue damage, and operating-room delays. Instruments magnetize through friction, magnetic mats, or mixed-metal processing. A prevent-detect-protect approach that segregates materials, trains staff, integrates QA checks, uses demagnetizers, and inspects visually mitigates the risk.
Every step of sterile processing exists to make sure an instrument is safe and performs exactly as intended for the next procedure. Risks exist in many forms: damage, staining, hidden bioburden, and more. But one risk is literally invisible and poses a hazard that can cause injury to patients during surgery, not to mention impact operating room time and frustration. That risk is magnetic instruments.
In a 2014 study, Philip Edgcumbe and colleagues at the University of British Columbia found that magnetization occurs in 38% of microsurgery cases.1 Left unaddressed, a magnetized instrument becomes a threat that attracts staples, clips, needles, and other small metal objects mid-procedure. This can lead to sharps injury, procedure complications and increased operating room time. Most common in microsurgeries such as those found in ocular, reconstructive or cardiac cases, facilities with these programs need to be aware of the risk.
How Instruments Become Magnetized
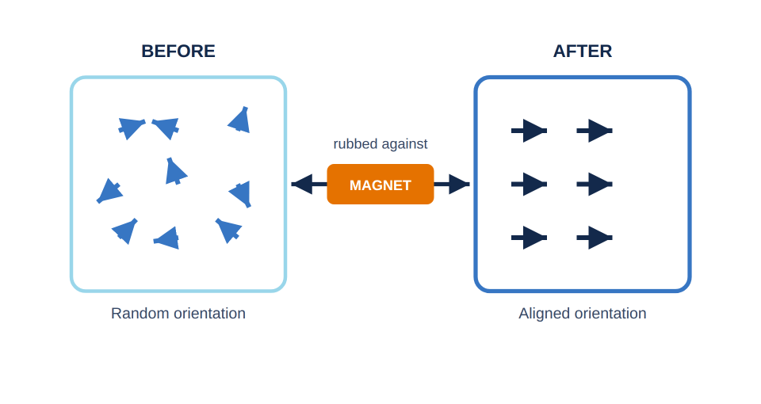
Magnetism is the force exerted by magnets when they attract or repel each other and is caused by the motion of electric charges.3 An object becomes magnetized when the atoms inside it are made to line up facing the same direction, which happens by rubbing the material against an existing magnet.
Most surgical instruments are manufactured from stainless steel.1 Stainless steel alloys are generally known as ferrous because they are made up of iron. Ferrous derives from the Latin term ferrum2 which is anything made of iron. Hence why the chemical symbol of iron is Fe. An instrument can become magnetized in a few ways:4
- Friction from repeated use: Fine, high-precision tools used in microsurgical and ophthalmic procedures can pick up a magnetic charge simply from repeated contact and motion against other ferrous metals.
- Magnetic mats on the sterile field: A common fixture for organizing instruments in surgery, magnetic mats are a direct source of exposure.
- Mixed-metal reprocessing: When ferrous metals are not kept separate where magnetism is present, magnetization risk spreads to the rest of the tray.
However it happens, the result is the same: an instrument that’s supposed to be inert starts behaving like a small magnet, affecting micro-objects like staples, sutures and needles.
How Magnetism is Introduced in the OR
Magnetic mats are commonly used in the surgical setting because they act as a landing zone for instruments to reduce the risk of sharps injuries. Guidance from AORN recommends a small rectangular basin or a magnetic pad that can act as the neutral zone when passing sharp instruments or devices, blades, and needles. A neutral zone can help avoid hand-to-hand transfers, which can significantly decrease injuries because sharps can be placed down in this one area so that only one person’s hand can grab the sharp at a time.5
Instruments are directly place on a magnetic field. Exposure to this field can now magnetize these instruments and this can create a problem for surgeons when using microsurgical instruments where there is little margin for error. Protocol should be established for noting the instruments that were placed on mats and if any interference with objects like needles and sutures was observed. This way, the instruments can be properly addressed before being used in another operation.
Microsurgery: Where the Margin for Error Disappears

Microsurgical instruments are fine tools designed for microsurgeries which require extreme accuracy under magnification, often procedures on delicate tissues like nerves, blood vessels, and fine anatomical structures. An example is microsurgical forceps, such as Bonn forceps, which have fine, tapered tips for grasping delicate tissue without crushing it.6 They’re essential in ophthalmic surgery.7 A magnetized forceps that unexpectedly attracts a staple, clip, or stray needle can pull it toward tissue which can cause punctures or tears that could create an adverse effect for the patient.
Another example are clips used to treat cerebral aneurysms. During this procedure, the neurosurgeon places a small metal clip on the opening of the aneurysm to obstruct the flow of blood. The clip remains in place on the blood vessel inside the brain.8
Imagine if in either scenario, a magnetized instrument adversely interacted with these forceps or clips: the results could be life-threatening. As researchers note, the consequences of magnetization “may include damage to the patient’s blood vessels and/or nerves, sub-optimal post-operative recovery, and increased operating room 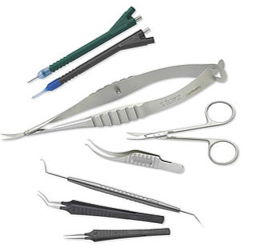 time.”1
That last point is important to note as well. OR time has been estimated at roughly $26 per minute once staffing, anesthesia, and recovery services are factored in.10 This means delays add up to a cost when staff must spend time managing a magnetized instrument.
There’s no room for an unplanned push or pull to a clip, staple, or suture as they can be devastating to patient safety and facility operations. Adapting a process that recognizes where magnetism is introduced and how to detect and remove it, is an essential step in patient safety.
Building a Process: Prevent, Detect, Protect
Closing this gap doesn’t require a major overhaul. It requires a deliberate process built around three goals.
Preventing magnetism is an important part of sterile processing workflows, and can be accomplished in a couple ways:
- Segregate ferrous and non-ferrous instruments during cleaning and sterilization instead of processing them together, if feasible.
- Train assembly and OR staff to recognize the instruments most susceptible. Typically fine, high-friction tools used in microsurgical work, so the risk is anticipated.
- Integrate magnetic checks as part of quality assurance (QA) processes. Don’t assume; just verify and validate, where/when time allots.
Detecting and removing magnetism
Detecting magnetized instruments during assembly is vital for staff and patient safety, removing it non-negotiable.4 Your department must also establish a protocol for removing it because that instrument is currently not safe and functional.
If a device is found magnetized in decontamination, like a needle holder with a needle stuck to it, tag it “Magnetized” so assembly staff removes the needle to the proper container and send the device for demagnetization. The OR should tag instruments that were magnetized during surgery the same way.
To remove magnetism, adapt a demagnetizer (also known as degausser).4 A demagnetizer uses electromagnets to generate intense, high frequency alternating current (AC) magnetic fields. As a result, electrons realign randomly, so their magnetic fields cancel and eliminate undesired magnetism.
After using a demagnetizer, use a proper visual inspection method before trays are assembled or instruments are peel-pouched or wrapped. This should not be confused with using a metal object like a paperclip. Paperclip and other ‘quick solution’ methods can pose a risk themselves. The author of an article in Healthcare Purchasing News references a time he was called into the OR because a paper clip was found in a surgical tray.4 The method used should be reliable, provide clear visuals to see if magnetism is present and it should reduce risk of further magnetism or adverse events.
Protecting staff and patients:
Protecting staff and patients from adverse events like sharps injuries caused by magnetized instruments is part of any operating or sterile processing departments’ goals. Adopting the right process to recognize and remove the risk requires simple steps that should be part of departmental process.
Magnetism is not harmless. It’s an invisible threat to safety. Departments that build a clear prevent-detect-protect process around it aren’t just closing a gap in their workflow — they’re removing a source of risk that is genuinely avoidable.
Check, demagnetize and verify all in one simple place? Check out our PureSteel™ Demag Station and make magnetic instruments a relic in your OR and SPD!
Works Cited
- Edgcumbe, Philip, et al. “Magnetization in Microsurgery: Causes & Potential Solutions.” Proceedings of the Canadian Medical and Biological Engineering Conference (CMBES), 2014 (https://proceedings.cmbes.ca/index.php/proceedings/article/download/743/737)
- Charlton T. Lewis, Charles Short, A Latin Dictionary, ferrum
- https://education.nationalgeographic.org/resource/magnetism/
- Magnetized Surgical Instruments | HPN Online
- How to Protect Yourself from Sharp Injuries | AORN
- Gupta, Sandeep, and Vijay K. Sharma. “Basic Instruments in Ophthalmic Surgery.” In Ophthalmic Surgical Instruments, edited by Jeewan S. Titiyal, Rajesh Sinha, and Vijay Kumar Sharma. New Delhi: Jaypee Brothers Medical Publishers, 2017. ISBN 9789386322975.
- https://webeye.ophth.uiowa.edu/eyeforum/tutorials/instruments/phaco/index.htm#gsc.tab=0
- https://www.hopkinsmedicine.org/health/treatment-tests-and-therapies/microsurgical-clipping-for-brain-aneurysms
- Okada, A. “Demagnetization.” HPN Online, 22 July 2025, www.hpnonline.com/sterile-processing/article/55298710/demagnetization.
- Grossi, Eugene A., et al. “The Cost of an Operating Room Minute for Heart Valve Procedures.” Journal of Health Economics and Outcomes Research, vol. 2, no. 2, 9 Mar. 2015, pp. 170-180, doi:10.36469/9898.
- American Society of Plastic Surgeons. 2024 Plastic Surgery Statistics Report. ASPS, 2025, www.plasticsurgery.org/documents/news/statistics/2024/plastic-surgery-statistics-report-2024.pdf.
- Reavey, Patrick L., et al. “Disappearing Digits: Analysis of National Trends in Amputation and Replantation in the United States.” Plastic and Reconstructive Surgery, 2018, doi:10.1097/PRS.0000000000004368.
- “Microsurgical Principles & Techniques: Setup, Instrumentation & Anastomosis Techniques.” The Plastics Fella, www.theplasticsfella.com/microsurgical-principles-techniques/.
RELATED PRODUCTS
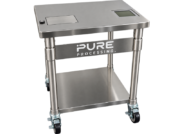
PureSteel™ Demag Station
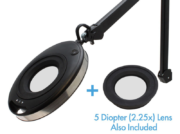
PureSteel™ 4.75x Magnification Task Light