When One-Size Doesn’t Fit All

Standardization is a highly sought-after goal: it provides consistency around expectations, practices and outcomes. It’s a common goal 
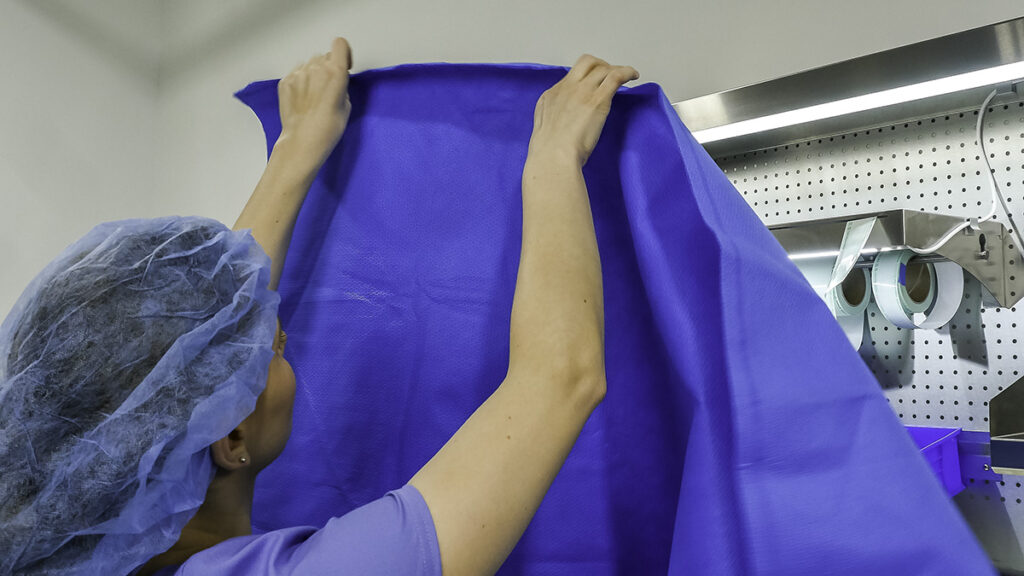
across healthcare, from clinical standards to health system enterprises. The intent behind standardization is to improve quality, optimize available resources and reduce preventable errors. However, are there situations where maybe the opposite can occur in standardization? When standardization overlooks nuances resulting in errors, inconsistencies and glossing over specific steps? Standardization can then have a negative effect on our goals.

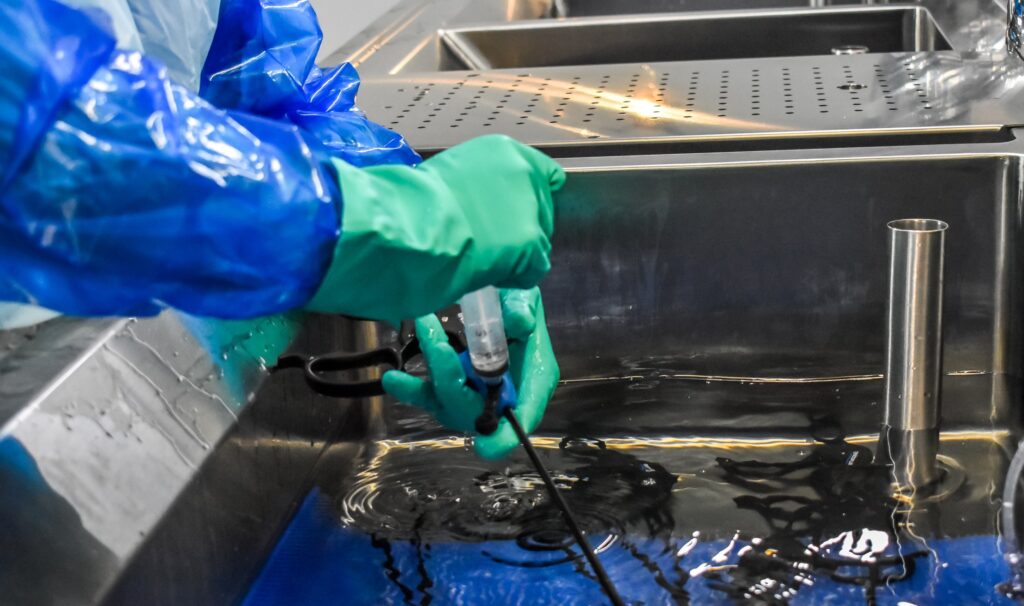
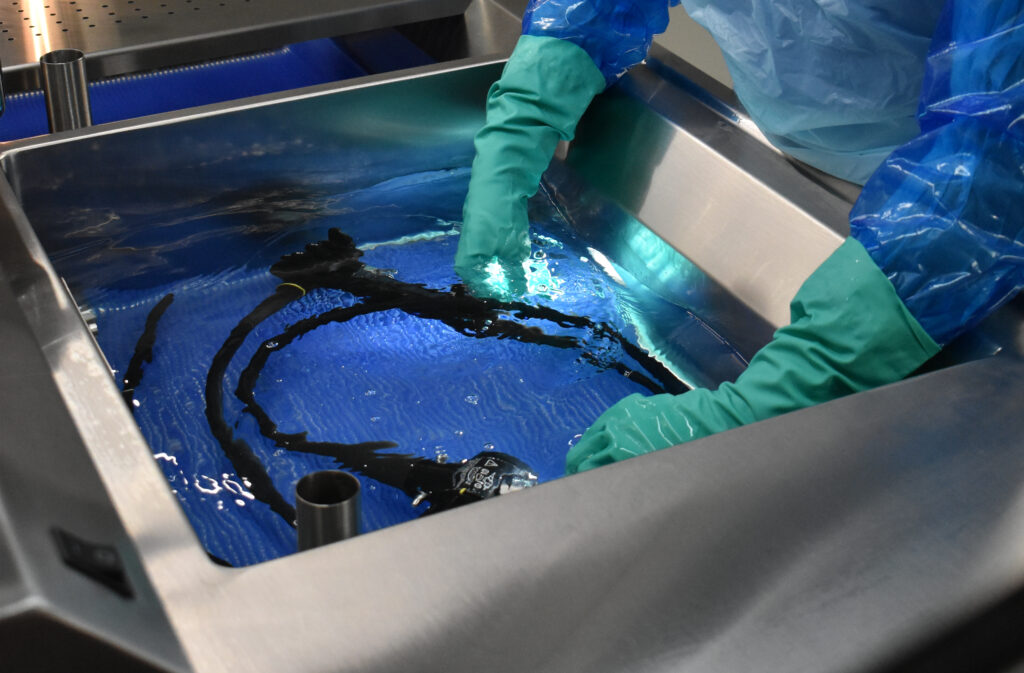
In sterile processing and endoscope-reprocessing departments, standardization initiatives can take on complex meaning when we acknowledge that not all workflows lead to the same outcomes. There are times where nuance plays a critical role in compliance and safety.

Thinking out of the box, we ask the question: would we get a higher return on investments with a specialized workstation than to ‘cookie-cutter’ our way to compliance?

So where does nuance and standardization intersect?

Specialized Processes vs Standardized Workstations

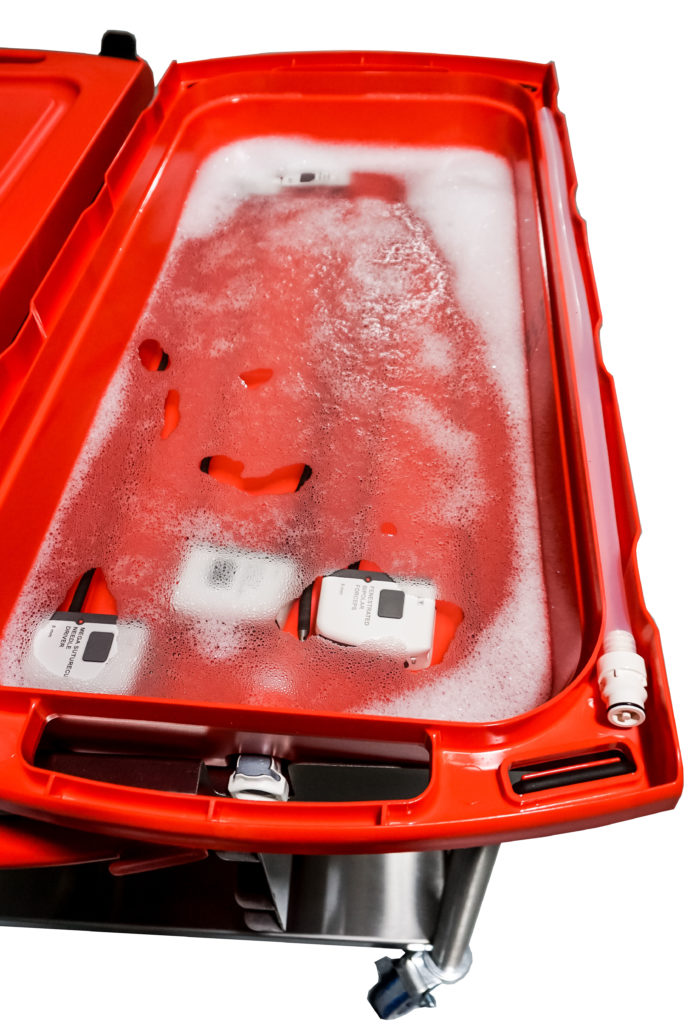
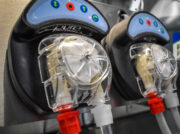
Start thinking of aspects during reprocessing where processes stand out from the norm. There are unique tasks that pop up through the day that require different resources to get the job done. It can include specialized sizes of wrap or peel packs that aren’t normally stocked at a standardized workstation. It can also be the use of a borescope or other quality assurance measure that requires availability for multiple users over the course of a shift, so placing it at a standard workstation reduces its accessibility to the entire department.

A standardized practice may result in specialized work environments in order to ensure its availability and capitalize on available resources.

High Volume Processes

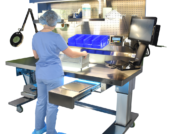
Is there a process you do consistently enough where having specific resources readily available would aid in the throughput? Circumstances where this can be identified can be if you experience a high volume of low-temperature sterilized medical devices where it warrants having a separate setup, like a wrap table or peel-pack workstation. It provides a new way to organize processes and supplies.

Another example would be instrument types that have separate processes than generalized instrumentation. Examples include ocular instrumentation, laparoscopic and robotic instrumentation or loaner instrumentation. All instrument types where policies and processes vary slightly but enough to call for workflow adjustments to eliminate guess work and misinterpretation of requirements for that specific process. Reducing the number of supplies in one location can help mitigate risk of inadvertent mistakes like the use of incorrect indicators, tapes or labels.

High volume, unique processes can overrun standard work areas and create workarounds, or the constant need to reorganize and rearrange to accommodate the changing needs throughout the day.

IFU and Process Compliance

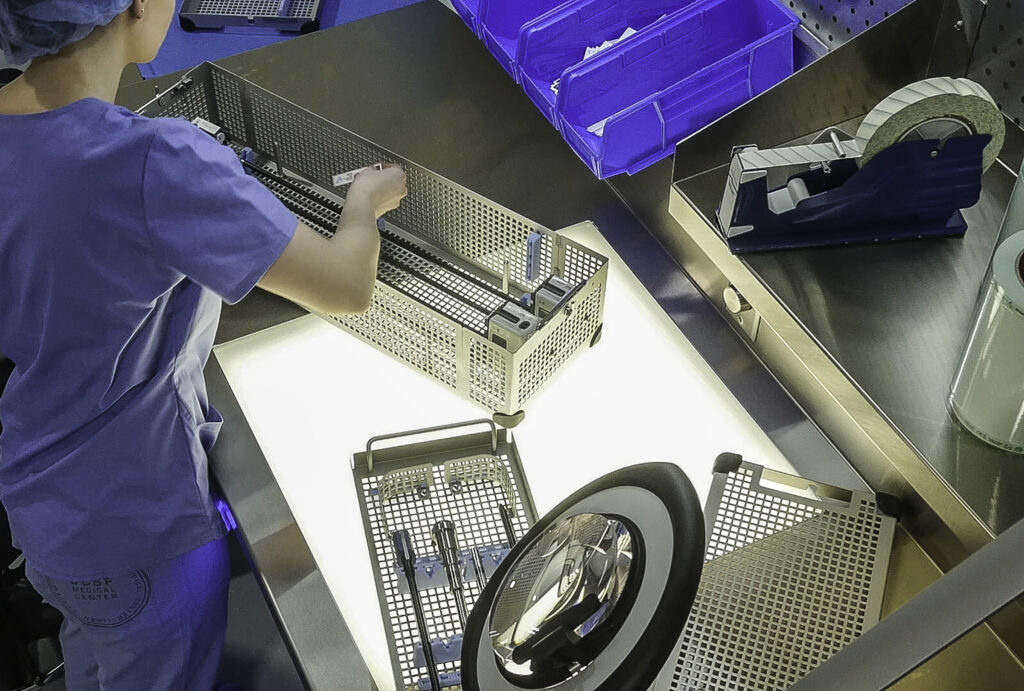
Not all instructions for use (IFU) are created standard; inspection points, tools and steps vary widely. Additionally, the type of instruments we reprocess can increase the number of times a specific task is repeated throughout the day to ensure compliance down to the most nuanced practices.

Where would something like this occur? Loaner trays. Loaner trays come in for a specific time and purpose. Bringing in these sets can require steps to be repeated such as wrapping, traying, weighing and additional data entry that is typically pre-built in our tracking system for owned instrumentation.

These processes can increase the amount of time it takes to process these trays and if supplies and resources are not centralized to a specific location, increase travel and wait time for technicians in an already extended process.

Budget Constraints and Limited Use Case

On the flip side of high-volume case needs, is the limited use case of some tools and inspection equipment. The use of a borescope may be required for certain medical devices being reprocessed, but there isn’t a justifiable volume to justify incorporating it into every workstation in the sterile processing department. Placing a single borescope at a multi-use workstation can limit its availability for use throughout the day and lead to workarounds, and interruptions in order to maintain compliance.

Standardization requires creative thinking, and an understanding that the focus of standardized care is on the outcome, and less on creating a one-size-fits-all process. There is a place for nuance and specialized equipment to ensure all resources are available and at the ready for safe, efficient and quality outcomes.


Curious to learn more about standardization and customization? Check out these links to discover more resources.

https://pure-processing.com/blog/the-weight-of-standardization-the-goal-the-change-and-the-process/

https://pure-processing.com/robotics-implementation-checklist/

Endoscope Manual Cleaning: A Fragile Chain

“A chain is only as strong as its weakest link.”

In an environment where manual cleaning is foundational, this quote is a fitting description of our endoscope reprocessing practices. Routinely auditing our processes keeps us apprised of the ‘weakest link’, where inconsistencies, interpretations and best guesses can negatively impact the quality of care.

Manual cleaning relies heavily on the focus, tenacity and consistency of our sterile processing and endoscopy technicians, all of which can be influenced by disruptions or distraction, often times, outside of their control. When it comes to our manual processes, it’s important to create robust practices that both provide consistency and support our reprocessing professionals, across every endoscope, every time.

In the 2025 GI Landscape Report, 39.37% of participants indicated that IFU compliance was a top consideration for their department endoscope practices. So when it comes to our manual cleaning processes, where do we audit to identify gaps?

Cleaning Chemistries

Cleaning chemistries, including enzymatics and detergents, have dosing recommendations that need to be adhered to for appropriate and safe concentration, as well as effective cleaning.

Point of Weakness: In a place where more isn’t always better, too much enzymatic can leave behind residue. In the same vein, underdosing can reduce cleaning effectiveness leaving behind bioburden and gross soil. Manually dosing provides room for under of overdosing.


Soak Times

Just as much as dosing the right amount of enzymatic or detergent is crucial, so is the appropriate contact time. Contact time ensures

transport container

chemistries have a chance to break down heavily soiled or dried bioburden properly.

Point of Weakness: Soaking times can be determined by both/either the chemistry manufacturer IFU or the medical device IFU. The practice of contact and adequate soaking times rely heavily on kept time and alerts to verify and affirm the right time requirements have been met to achieve the intended results. Facilities without timers or alerts run the risk of breaching soaking IFU.

Brushing

Flexible endoscope channels are long, dark and may be damaged. It’s a place that cannot be easily viewed during the manual cleaning process. Adequate brushing techniques are a must and understanding how brushes work better equips technicians to use them appropriately.

Point of Weakness: Brush contact with the internal channels is done without immediate visual verification, and though flexible endoscope IFU can provide guidance to include brushing until the brush comes clean, the results are still arbitrary and assumed.


Flushing

Flushing channels is a crucial step in the manual cleaning process. Copious amounts of cleaning solutions, water and critical rinse are

essential for effective reprocessing.

Point of Weakness: Manual flushing presents ergonomic strain from the repetitive motions of push and pull to fill and express the syringe when cleaning channels. The strain effects consistency and technician endurance as muscles fatigue during repetitive movements.  Consequently, this also leads to variance in pressure and volume being released from the syringe during the flushing step.

Inspection

Cleaning verification and inspection continues to gain traction in flexible endoscope reprocessing. Flexible endoscopes have many “hidden” areas where bioburden can be difficult to remove, and lead to adverse effects to both the endoscope and the patient.

Inspection incorporates various types of tools and resources including lighting, magnification, borescopes and even cleaning verification tools that measure organic residues such as protein or ATP. Each tool has its own unique intent and purpose.

Point of Weakness: Without adequate and fully comprehensive inspection tools, verification of effective cleaning is near impossible. Magnification can be an aid, but doesn’t visualize internal components. Additional lighting can improve visualization but doesn’t offer focused precision viewing. Endoscope workflows that lack comprehensive quality assurance (QA) steps risk bioburden reside inside channels.


Guess work will break down processes and quality in a swift motion, with an impact that reaches far beyond the decontamination sink. It breaks down each process that follows and if not caught or identified before storage, can lead to adverse effects in the procedure.  Knowing where our weakest links are and improving them sets us up for a stronger processes, sustainable practices and quantifiable assurance of quality outputs.

Curious to learn more about trends and additional insights into flexible endoscopes reprocessing? Download our 2025 GI Landscape Report, here. You can earn 1 free CE credit, too!

Ultrasonic Cleaning: How it Works

Ultrasonics can be found in most sterile processing departments today and are often the first automated cleaning cycle medical devices will be subject to after manual cleaning is complete. The intent of the ultrasonic cycle is to clean and remove soil from areas that aren’t easily accessible via manual cleaning steps like brushing or wiping. These tough to reach areas can include joints, lumens, and crevices; areas where bioburden can build up over time, unseen.

Ever been curious to know exactly how this ultrasonic bath works and what makes it such a critical step in decontamination? We will unpack the definition, the steps and the maintenance, so that you can get the most out of your ultrasonic use!


First, Some Definitions

According to the HSPA Sterile Processing Technician Manual, Ninth edition, the definition of ultrasonics is broken down this way: “Ultra’ means beyond and ‘sonic’ mean sound. When an ultrasonic wave passes through a liquid, it makes the liquid vibrate.” This creates what we know as cavitation. The ultrasound waves create low-pressure bubbles within the ultrasonic bath that implode, dislodging soil from surgical instruments.

Ultrasonic sound waves can range anywhere from 18-100 kHz, with many in SPD within the range of 40 kHz. A study conducted found that 40 kHz provided a “very uniform ultrasonic cleaning field and higher cleaning capability” (HPN, 2024)

When we can define our equipment and processes, we are better able to speak clearly to its intended purpose and use this knowledge to empower and guide our facility practices.


The Process Basics

There are key practices to note when ultrasonic cleaning is part of your workflow. ANSI/AAMI ST79 Section 7.6.4.4 highlights key recommendations on how to effectively and safely utilize ultrasonic cleaning: “Gross soils and detergents should be removed before instrumentation is placed in the ultrasonic equipment. Residual gross soil and detergents left on instrumentation can impact the effectiveness of the ultrasonic cycle and the overall cleanliness of the instrument.”

Instrumentation that is subject to ultrasonic cleaning must be fully submerged in the ultrasonic bath and run on the appropriate cycle length based on the manufacturer IFU.

There are cleaning solutions designed specifically for ultrasonic cleaners. These specific enzymes are formulated to enhance the ultrasound cleaning capabilities and work with the cavitation process to remove gross soil from instrument crevices and areas that cannot be reached by manual methods. Reviewing your equipment IFU will help you determine the appropriate one to use with your specific machine.

After the ultrasonic cycle is complete, instrumentation should be rinsed to remove any residual ultrasonic cleaning chemistries and contaminants before moving on to the next phase of the cleaning process.

There are various types of ultrasonic cleaners available today ranging from table-top to irrigating. It’s important to know the type, features and capabilities that your surgical instruments require and plan appropriately.


Maintenance & Usage Recommendations

Just like the surgical instrumentation we care for, our cleaning equipment also requires care and maintenance. The details of care can be found in our equipment manufacturer IFUs, but universally there are some basic steps that should be taken to care for your ultrasonic cleaners.

Do:

  • Perform routine maintenance such as cavitation testing and cleaning verification tests. You can reach out to your ultrasonic manufacturer for recommended test types and frequency.
  • Cleaning your ultrasonic cleaner on a regular cadence as recommended by the equipment manufacturer.
  •  Keep the lid of your ultrasonic closed during the cleaning cycle to reduce aerosolization from spreading across the department.
  •  Degas your ultrasonic bath each time the cleaning solution is replaced. The practice of degassing removes any trapped air or other gases that may impact the cleaning solution and impede cavitation from occurring.

Don’t:

  •  Avoid placing materials such as glass, soft metal and plastics in your ultrasonic cleaner. Verifying material compatibility ensures that instruments are not damaged, nor does the type of material impact the effectiveness of the ultrasonic cycle.
  • Avoid overloading your ultrasonic baths as this can also impact ultrasonic cycles and hinder contact exposure of the surgical instrumentation with the enzymatic solution.

Ultrasonic cleaning is only as effective as the care we take to prepare and handle both the ultrasonic and the surgical instrumentation subject to its intricate cleaning capabilities.

Ultrasonics are a great tool in our cleaning process. The more we understand the process, the better equipped we are to use its capabilities to its fullest extent.


References

· HSPA Sterile Processing Technician Manual, 9th Edition (2023)

· ANSI/AAMI ST79

· General Ultrasonic Cleaning Questions, HPN 2024 https://www.hpnonline.com/sterile-processing/article/55128962/general-ultrasonic-cleaner-questions

Using Data to Hold Vendors Accountable in Sterile Processing

Marc Finch

In today’s fast-paced surgical environment, the role of sterile processing departments (SPDs) extends far beyond cleaning and reassembling trays. With an ever-increasing reliance on vendor-supplied loaner instrumentation, SPDs are expected to balance precision, efficiency, and compliance, often with limited resources. One of the most powerful tools to manage this complexity is data.

Marc Finch, Senior Surgery Management Consultant at Sullivan Healthcare Consulting and member of Pure Processing’s Voice of the Customer (VOC) council agreed to dig into using data to hold vendors accountable following our June 2025 VOC call. Explore how tracking key performance indicators (KPIs) related to vendor interactions can help SPDs improve outcomes, enforce standards, and build collaborative relationships rooted in accountability.


Track Delivery and Pickup Timeliness

One of the most straightforward and critical metrics to monitor is tray arrival and pickup timing. Many departments implement policies requiring vendors to deliver trays at least 48 hours before surgery and retrieve them within 24 – 48 hours after the case is completed. These timeframes help ensure adequate processing and prevent storage overflow.

Failing to meet these timelines shouldn’t go unnoticed. When vendors repeatedly miss the mark, departments may consider implementing consequences such as delayed tray access, storage fees, or escalation to vendor leadership. Just as importantly, vendors who consistently meet or exceed expectations should be acknowledged as reliable partners.


Monitor IFU and Inventory Compliance

Instruction for Use (IFU) documentation and complete inventory lists are non-negotiables for safe and effective reprocessing. Departments should require that vendors either physically bring the correct IFUs or send them electronically prior to tray arrival. Some organizations also mandate a photo of the tray and a weight check upon arrival to ensure consistency and thorough documentation.

If IFUs or inventory documentation are missing, departments can justifiably refuse to process the trays. Clear documentation of these refusals provides transparency and supports enforcement of policies.


Assess Frequency of Use for Loaner Optimization

If a loaner tray is used frequently, it might make more sense to transition it to consignment. Tracking how often specific trays are brought in can help departments determine whether they’re being over-reliant on one-off loaners. While purchasing may not always be practical, especially given the rate of technology change, consignment can offer the benefits of accessibility and readiness without the burden of ownership.

This data can also open conversations about consolidating trays or adjusting instrument sets based on usage patterns and surgeon preferences.


Evaluate Vendor Responsiveness and Communication

Good vendor relationships are built on trust and responsiveness. With modern loaner software, departments can track how quickly vendors confirm upcoming procedures and respond to requests. Delayed acknowledgments or a pattern of last-minute tray deliveries can lead to inefficiencies, reprocessing delays, and even surgical rescheduling.

When vendors are consistently unresponsive, having the data to show specific instances and trends allows SPDs to escalate appropriately or reconsider vendor relationships altogether.


Inspect Instrument Condition and Rejection Rates

Instrument quality is a serious concern. Departments often encounter trays with cracked containers, instruments marked with non-compliant engraving or deteriorated tape, or pitted and damaged tools. Rejecting these trays is not only appropriate, but also essential for patient safety and compliance.

Establishing a formal process for recording tray rejections, especially if tracked per-vendor, can help drive improvement. Communicating these data trends with vendors encourages proactive quality checks and reinforces shared accountability for safe surgical outcomes.


Use Check-In Data to Streamline and Standardize

Dedicated vendor check-in spaces help consolidate incoming trays and ensure consistent documentation. With time-stamped check-ins, required photo documentation, and IFU uploads, these centralized spaces allow for better tracking and standardization. Some organizations use mounted cameras or integrated software to capture and log every step, reducing the chances of human error or incomplete records.

This structured approach doesn’t just streamline the workflow, it also strengthens the department’s ability to defend its practices, monitor vendor compliance, and reduce operational friction.


Closing Thoughts

Data isn’t just about charts and numbers; it’s about insight, consistency, and leverage. When used thoughtfully, data allows sterile processing departments to create fair expectations, spot issues before they escalate, and ultimately provide better support for surgical teams. As more departments invest in tracking systems and formalize their metrics, vendor accountability will shift from a frustration point to a shared opportunity for excellence.


Interested in more VOC content? Click here!


About: Voice of the Customer Committee

The Voice of the Customer Committee is a panel of healthcare and instrument reprocessing professionals who have graciously donated their time to share their expertise and guidance on current challenges faced by the instrument reprocessing community. Through sharing their insights, experiences, and best practices, we have been given the opportunity to share these findings with our readership. We’d like to thank our VOC members for their outstanding input and insights, as well as their time! Thank you for your continued partnership, and all you do.

Building Stronger Vendor Policies: Accountability, Safety, and Collaboration in Sterile Processing

As vendor-delivered surgical trays continue to be a vital part of hospital operations, the policies governing how and when those trays arrive, and what happens when they don’t, play an essential role

Tami Heacock

in maintaining surgical readiness, safety, and departmental efficiency. Setting clear, enforceable, and realistic policies isn’t just about logistics; it’s about accountability, patient safety, and preserving strong clinical partnerships.

Pure Processing’s Voice of the Customer (VOC) council met in June 2025 to discuss vendor challenges and accountability. Tami Heacock, System Director of Sterile Processing at Lee Health and VOC member, agreed to expand the conversation and go deeper into policy decisions surrounding loaner operations in sterile processing. Here are six key takeaways for designing and implementing effective vendor policies in sterile processing departments.


Set Realistic and Department-Specific Delivery and Pickup Standards

Not every department can accommodate a one-size-fits-all policy. While industry guidelines may suggest 24-hour delivery standards, departments must consider their own limitations, such as square footage, staffing, and storage capacity. For some facilities, 48-hour delivery windows may offer necessary buffer time for inspection and reprocessing, especially when complex trays or new instrumentation are involved.

Similarly, timely pickup should be enforced. Whether your policy allows 24, 48, or 72 hours for vendors to collect trays post-case, set expectations that align with your actual space and processing workflow, and make sure vendors are aware that SPD is not a storage facility.


Require IFUs, Count Sheets, and Pre-Arrival Documentation

Every incoming tray must be accompanied by complete documentation: current Instructions for Use (IFUs), count sheets, and tray images. These elements are essential for safe processing, particularly if the tray has special sterilization requirements like extended ultrasonic bath times or nonstandard steam cycles.

Without this information ahead of time, SPD teams risk using inappropriate sterilization parameters, which could compromise instrument sterility and patient safety. A policy requiring vendors to provide these details, preferably 48 hours in advance, empowers SPD teams to catch red flags before they cause a delay or an incident.


Align Stakeholders and Secure Cross-Department Buy-In

Vendor policies impact more than just SPD. OR teams, risk management, infection prevention, supply chain, and executive leadership all have a stake in ensuring smooth case flow and safe surgical practices. It’s critical to involve these stakeholders from the start, framing the policy not as a punishment for vendors but as a shared accountability tool.

Involving infection prevention, in particular, can be a powerful accelerator. Their advocacy for proper standards and compliance can be the deciding factor in getting resources approved and policy changes adopted.


Introduce Penalties Thoughtfully… And Back Them with Data

When warning letters and suspensions don’t drive compliance, financial penalties can help. One approach is implementing fines (e.g., $250 per tray) for late deliveries that violate policy. However, these must be developed carefully:

  • Legal teams must verify vendor agreements allow for policy enforcement.
  • Recordkeeping must be watertight, using timestamps, vendor signoffs, and digital logs or software.
  • Exceptions should be documented, rare, and not habitual; what starts as flexibility can quickly become expectation.

The most effective fines are those that rarely need to be used. A single instance of enforcement often reshapes vendor behavior.


Strengthen Communication with Surgeons and OR Teams

Sterile processing can’t function in a vacuum. Late trays affect OR schedules, surgeon satisfaction, and ultimately patient care. Keeping surgeons informed of potential delays, ideally well before the day of surgery, builds credibility and encourages their support in vendor compliance conversations.

Clear, specific, and unemotional communication helps avoid misunderstandings. Instead of saying “all the trays were late,” clarify: “8 of the 13 trays for tomorrow’s 7:30 AM case arrived after the deadline.” Avoid exaggeration and always document interactions to build trust and protect against finger-pointing.


Plan Ahead for Accountability, Not Punishment

Ultimately, the goal of vendor policies is not retribution, it’s consistency and reliability. Vendor relationships should be rooted in mutual understanding, not surprise enforcement. That’s why advance notice, clear documentation, and a transparent appeal or communication process are vital.

If penalties are collected, avoid routing the funds directly to SPD to prevent conflicts of interest. Instead, consider donating to employee assistance programs, hospital foundations, or other neutral entities.


Conclusion

Strong vendor policies don’t just protect surgical schedules, they protect patients. By aligning policy with departmental capabilities, engaging key stakeholders, and using data to support decisions, sterile processing departments can foster vendor accountability while maintaining the collaborative relationships necessary for successful surgical outcomes.


Interested in more VOC content? Click here!


About: Voice of the Customer Committee

The Voice of the Customer Committee is a panel of healthcare and instrument reprocessing professionals who have graciously donated their time to share their expertise and guidance on current challenges faced by the instrument reprocessing community. Through sharing their insights, experiences, and best practices, we have been given the opportunity to share these findings with our readership. We’d like to thank our VOC members for their outstanding input and insights, as well as their time! Thank you for your continued partnership, and all you do.

Optimizing Vendor Operations in Sterile Processing: Practical Strategies for Efficiency and Accountability

Scott Shuagis

In June 2025, our Voice of the Customer (VOC) council met to discuss an ongoing issue for many sterile processing departments: Vendor/Loaner challenges and accountability. Scott Shuagis, Interim Sterile Processing Manager at Cone Health dove deeper with Pure Processing following the VOC call to dig into how sterile processing departments can streamline and optimize vendor operations.

In many hospitals, vendor coordination within the sterile processing department (SPD) is a source of daily frustration. Whether it’s late-arriving trays, communication gaps, or inefficient reprocessing, misaligned vendor practices can cause delays and impact patient care. However, several SPD leaders are pioneering strategies that streamline vendor operations, enhance communication, and ensure instruments are ready when needed.

Here are some of the most impactful practices and technologies gaining traction:


Implementing a Pod Tray System

Pod tray systems are revolutionizing how trays are sterilized and transported. These modular containers allow entire sets including drills, retractors, and other instruments to be loaded together with a single filter.
Benefits of systems like these include:

  • Faster drying and sterilization: The pod design wicks away moisture more efficiently than traditional wraps, helping eliminate wet packs.
  • Fewer holes and rewraps: Unlike individually wrapped trays, pods reduce the risk of holes during handling.
  • Streamlined OR setup: The OR receives one sealed pod rather than several separate packages, improving workflow and reducing prep time.

Pods are reusable, configurable, and support high-volume case turnover with fewer processing setbacks. While the filter is a consumable cost, many departments see strong ROI through time savings, reduced rework, and improved OR satisfaction.

Staff education/training:

  • Staff thoroughly inspecting each tray for defects. If a single tray has a defect the entire Pod is contaminated.
 

Using Tagging and Color-Coding Systems

Tagging trays with scannable labels and implementing color-coded systems (e.g., pink for Monday, green for Tuesday) helps SPDs and vendors visually track trays at a glance. This simplifies:

  • Forecasting and prioritization: Teams can quickly identify which trays need to be processed first. Next day forecasting: OR team and SP leadership engages surgical schedule next day vendors.
  • Day-to-day organization: Color tags enable proactive planning when anticipating high vendor volume on specific days.

Adding a second tag that is scanned post-op also initiates a timer, alerting vendors when it’s time to retrieve or reset trays, ensuring nothing gets forgotten. These systems also provide time-stamped documentation that supports better accountability across the board.


Leveraging Data to Drive Accountability

Modern vendor management systems integrated with SPD tracking tools allow teams to collect granular data on:

  • Tray defects (e.g., rust, broken instruments, contamination)
  • Vendor timeliness
  • Case readiness

This data can be used to identify consistent issues, hold vendors accountable, and support meaningful conversations with surgeons when performance doesn’t meet standards. When data shows clear patterns, it becomes easier to engage OR leaders in driving change or pressuring vendors to meet expectations.


Establishing Policies Around Vendor Timeliness

While late tray fees are often ineffective (and potentially passed back to the hospital), establishing clear vendor policies is still essential. Strong policies should:

  • Define clear timelines for delivery (e.g., trays must arrive 24 hours before surgery)
  • Outline consequences for late delivery based on data
  • Be reviewed with surgical teams regularly to ensure alignment and support

Rather than punitive measures, a data-driven policy encourages collaboration. Sharing monthly vendor timeliness reports with surgeons can shift attitudes and open the door to improvements without creating friction.

  • Next Policy update: All vendors will perform an annual Prevented Maintenance (PM) program, Physicians on board due to continues brown staining thus holding vendors countable for their trays. This annual program will be set in vendor management system.


Creating Dedicated Vendor Check-In Spaces

Designating a breakout room equipped with:

  • A label printer
  • Scale
  • Camera
  • Workstation with vendor software access

…gives vendors the tools they need to register and tag trays correctly the first time. Centralizing this process reduces errors, improves tray tracking, and accelerates downstream workflows. These check-in zones can also serve as controlled spaces where SPD staff confirm tray contents, inspect packaging, and prepare the pods for sterilization, cutting down on congestion at decontamination.


Training Vendors on SPD Software and Processes

SPDs benefit greatly when vendor reps are properly trained on the department’s tracking systems and procedures. Key elements of vendor onboarding should include:

  • Hands-on use of tagging systems
  • Understanding internal policies (e.g., pods cannot be taken upstairs by vendors, only SP staff member)
  • Basic knowledge of software like SQ Track, SPM, or Censis Technologies.

Having dedicated SPD IT support can be a game changer. When vendors understand not just how to use the system, but how their data flows into operational decisions as well, compliance improves and rework declines. Ongoing refreshers can also help new reps acclimate quickly and maintain system integrity.


Strengthening Communication Between SPD and OR

Vendor-related inefficiencies often stem from a lack of alignment between SPD and the OR. Building strong relationships with OR teams and surgeons can:

  • Improve scheduling accuracy
  • Reduce last-minute tray requests
  • Support accountability when cases are delayed due to missing or late trays

Regular, transparent communication, especially with engaged surgeons, can create a culture of partnership rather than blame. When SPD, OR, and vendors all operate from shared expectations and mutual respect, the result is fewer delays, better outcomes, and greater job satisfaction across teams.


Final Thoughts

Optimizing vendor operations isn’t about shifting blame, it’s about building processes that eliminate guesswork, reduce inefficiencies, and enhance patient care. With the right tools, policies, and collaboration, SPDs can transform vendor coordination from a daily pain point into a well-oiled machine.

By investing in systems like pods, color-coded tags, data dashboards, and vendor workstations, and by fostering accountability and communication, SPDs can better manage vendor complexity and stay focused on what matters most: safe, sterile instrumentation delivered on time.


Interested in more VOC content? Click here!


About: Voice of the Customer Committee

The Voice of the Customer Committee is a panel of healthcare and instrument reprocessing professionals who have graciously donated their time to share their expertise and guidance on current challenges faced by the instrument reprocessing community. Through sharing their insights, experiences, and best practices, we have been given the opportunity to share these findings with our readership. We’d like to thank our VOC members for their outstanding input and insights, as well as their time! Thank you for your continued partnership, and all you do.

The Importance of Leak Testing at the Decontamination Sink

Leak testing isn’t just a box to check in sterile processing and GI departments. It’s a frontline defense for patient safety. When working with flexible endoscopes or intraoperative ultrasound probes, ensuring their internal integrity is intact is critical. That integrity check starts at the decontamination sink.

Why Leak Testing Matters

A compromised instrument, such as a flexible endoscope with a pinhole or tear, cannot be reliably cleaned or disinfected. Fluids can enter internal components which harbor bioburden and expose patients to infection risks. Leak testing helps detect these issues before endoscopes and probes move further along the reprocessing workflow. This prevents costly repairs, cross-contamination, and possible infections.

Missed or failed leak tests can lead to serious consequences. Internal fluid invasion often results in damage to critical components like image bundles, light fibers, or angulation systems. According to industry data, fluid invasion is one of the leading causes of endoscope failure. Repair costs can easily range from several thousand dollars to full endoscope replacements. Worse, undetected damage can lead to retained bioburden, putting patients at direct risk of infection.

What Should Happen at the Decontamination Sink?

At the decontamination sink, leak testing is one of the first steps after point-of-use treatment and transport. The process typically includes:

• Connecting the endoscope to an automated or manual leak testing device

• Submerging the instrument in clean water within a designated basin

• Observing for bubbles (which indicate a leak) while gently flexing or articulating the scope

Every leak test must be performed with full attention and precision. There is no room for shortcuts. Missing a leak means risking patient safety. Leak testing is also not optional. It is a critical safety check that protects patients and prevents harm.

How the Sink Environment Supports Leak Testing

The design of your decontamination sink can support or hinder effective leak testing.

Features that make a difference include:

• Integrated basin lights to help illuminate water for clearer visual inspection, ensuring even the smallest bubbles aren’t missed

• Proper basin depth and size to ensure full submersion without crowding

• Built-in timers or workflow prompts to reinforce proper soaking and testing times


When Should You Leak Test?

Most IFU require leak testing before any brushing or flushing begins, right at the start of manual cleaning. This ensures that any internal damage is identified before fluid can enter the device. The results of the leak test will determine how the next steps in the process will occur. A failed test should immediately halt reprocessing and send the scope for repair.

As emphasized in ANSI/AAMI ST91, Section 7.4.1, leak testing should be performed as soon as possible after the endoscope arrives in the processing area and before immersion into any solutions. Critically, “leak testing can detect damage to the endoscope that could, if undetected, allow for fluid invasion into areas not designed for fluids and pose a potential risk of cross-contamination.” These fluids can include water, chemicals, and biological matter that accumulate from the time the breach occurs until it is identified. 1

This highlights why leak testing is one of the most important safety checkpoints in the reprocessing cycle. It helps prevent cross-contamination, protects patient safety, and reduces the risk of internal instrument damage.


Common Pitfalls to Avoid

A couple common areas where leak testing processes fail include:

• Skipping it completely due to time constraints or backlogs

• Performing leak testing after brushing, which increases the risk of fluid ingress

• Using basins with poor visibility or failing to fully submerge the insertion tube

• Not flexing the scope during testing, which may cause leaks to go unnoticed

• Triggering a false fail result due to improper connections, residual air bubbles, or overly aggressive articulation

• Flexible endoscopes that cannot be leak tested should not be used.1

Building Leak Testing into a Culture of Safety

Leak testing is a small step that has a big impact. Facilities that prioritize it often pair

technician training with visual reminders at the sink, use designated tools or testing areas, and monitor compliance. Creating a culture where every technician understands the reason behind leak testing strengthens the entire chain of reprocessing.

Leak testing at the sink is not just a procedural requirement. It is a critical patient safety checkpoint. With the right equipment, training, and habits, sterile processing departments can catch damage early and protect both their patients and their scopes. When done consistently and correctly, leak testing helps avoid costly repairs, scope downtime, and most importantly, patient harm.


Interested in learning about our solutions for sterile processing decontamination sinks?

Contact us today to explore solutions tailored to your team’s needs.

Works Cited

1. ANSI/AAMI ST91:2021

Surgical Instrument Protection Starts at the Decontamination Sink

When protecting surgical instruments, many think about the prep and pack area or the case cart. One overlooked area? The decontamination sink.

This early step in the reprocessing cycle lays the groundwork for instrument longevity, patient safety, and overall workflow efficiency.


Why start at the decontamination sink

The decontamination sink serves as more than just an early tool in the reprocessing cycle, it’s the place where frontline defense against bioburden buildup, corrosion, and mechanical damage happens. Instruments arrive from the OR at their most soiled state: exposed to blood, debris, and moisture that, if not addressed promptly and properly, causes irreversible harm.

Improper soaking, poor handling, or insufficient flushing at the decontamination sink often leads to 4 big instrument issues.

1. Corrosion and pitting

Surgical instruments are often made from high-grade stainless steel, which is resistant, but not immune, to corrosion. Extended exposure to blood, saline, or other corrosive fluids, especially without prompt and thorough cleaning, can cause the instrument’s protective passivation layer to break down. This leads to rust, pitting, and irreversible surface damage. Once this occurs, instruments may harbor bacteria in microscopic crevices and require removal from service or costly repair.


2. Stuck or stiff joints

Hinged and ratcheted instruments are particularly vulnerable to build-up in crevices. If joints are not flushed and soaked properly, organic debris and dried soils can accumulate in these small spaces. Over time, this results in stiff movement or complete joint failure, jeopardizing instrument function and risking procedural delays or complications in the OR.


3. Retained bioburden

Ineffective flushing of lumens and cannulated instruments, or inadequate scrubbing and soaking of complex devices, can allow microscopic debris to remain. Retained bioburden poses a serious infection risk and can compromise the efficacy of subsequent disinfection or sterilization. This is especially dangerous in minimally invasive or robotic procedures, where precision tools are reused across multiple cases.

4. Premature instrument failure

The combined effects of mechanical damage, corrosion, and retained debris accelerate the wear and tear on surgical instruments. When instruments fail sooner than expected, departments face increased repair or replacement costs. This can also strain budgets, delay case readiness, and reduce the availability of backup instruments, especially in high-volume ORs.

These issues affect surgical outcomes and result in costly repairs or replacements.


How Decontamination Sinks Support Instrument Integrity

A well-designed decontamination sink plays a critical role in protecting surgical instruments and supporting technician performance. Features such as adjustable height settings, integrated flushing systems, and defined soaking zones clean instruments thoroughly while complying with IFU requirements.

Look for decontamination sinks that offer 5 features which prolong instrument integrity.

1. Instrument-safe soaking areas

Designated soaking zones with clear boundaries prevent instruments from piling up or crowding in one basin. These areas should be sized and shaped to allow full immersion of instruments without stacking, which minimizes the risk of mechanical damage.

2. Hands-free flushing systems

Automated flushing systems provide a safer, more ergonomic method for cleaning lumened and cannulated devices. Thorough flushing eliminates retained bioburden and removes blood and saline residues that can corrode internal surfaces. Effective flushing also reaches tight joints, preventing buildup that causes stiffness.

3. Enhanced visibility and ergonomic support

Integrated lighting such as in-basin or overhead task lights improves visibility during cleaning, helping technicians

inspect joints, hinges, and surfaces more thoroughly. Clearer views support more effective brushing, early detection of damage, and better debris removal while reducing eye strain and improving workflow accuracy.

4. Dedicated timers and compliance tools

Built-in digital timers or soaking countdowns can be essential for meeting the strict time frames outlined in instrument IFUs, especially for enzymatic pre-treatment or manual soak times. Timers remove the guesswork and reduce the risk of under- or over-soaking, both of which can compromise cleaning effectiveness or damage instruments with extended exposure to certain detergents.

5. Silicone liner

Durable, medical-grade silicone liners placed inside sink basins or on staging areas provide a cushioned surface that absorbs impact wheninstruments are dropped or placed quickly. These liners help prevent tip damage, misalignment, and other mechanical stress while also protecting delicate instruments from scratches that could lead to corrosion.

Build a culture of instrument protection, starting at the decontamination sink

Sterile processing departments that prioritize best practices take a proactive approach to instrument safety, starting at the decontamination sink to set the tone for the rest of the reprocessing cycle. Prioritizing this essential step helps reduce repair costs, eliminate workflow delays, and gives surgical teams confidence in the tools they use.

While proper point-of-use treatment in the OR is the first defense in protecting surgical instruments, true reprocessing begins at the decontamination sink, where thorough cleaning and handling practices help preserve instrument integrity and support surgical success.

Interested in learning about our solutions for sterile processing decontamination sinks?

Contact us today to explore solutions tailored to your team’s needs.

Unique Challenges in Prep & Pack: When Standardization Isn’t an Option

In a perfect world, every workstation in Prep & Pack would be outfitted with the exact same tools, technologies, and workflows. Each technician would sit down to a consistent setup: same inspection tools, same layout, same process. But in reality, SPD professionals know that’s rarely the case.

A new instrument arrives that requires insulation testing or demagnetization. The capability doesn’t exist in your current setup, and budget constraints mean you’re only approved for two new accessories, despite needing four to standardize across all stations. So, you do what SPD professionals always do: adapt.

You get what you need to get started. You patch together a workaround. You share tools between stations. And before long, the cycle repeats, adding new tools without a scalable way to organize or sustain them.

These seemingly small gaps create unique challenges in the Prep & Pack area that can impact workflow, quality, and technician satisfaction:

Lopsided Workstations

Each assembly station ends up looking slightly different, while the expected tasks and intentions stay the same. While the instruments and IFUs may be consistent, the tools available to each technician are not. This inconsistency introduces risk, especially when critical inspection steps rely on specialized tools or accessories that are available at one station but not the next.

Scattered Inspection Tools

Demagnetizers, insulation testers, light sources, scopes, they all have a home, but it might change daily. Accessories float between stations or end up stored in catch-all drawers, slowing down processes and increasing the likelihood of tools being damaged, misplaced, or forgotten.

Broken or Inconsistent Processes

When tools aren’t standardized, neither are processes. Technicians develop individual workarounds or preferences, which slowly erodes consistency across the department. This makes onboarding and cross-coverage harder, and contributes to confusion when something goes wrong.

Add, Don’t Subtract

Most SPDs are very good at adapting, but not always at refining. Tools and accessories are added to respond to new needs, but outdated tools are rarely removed. Over time, this clutter adds cognitive and physical load to already demanding tasks and limited real estate.

Shrinking Workspace

Every tool that’s added takes up space that technicians need to lay and sort surgical instruments, review IFUs, and complete inspections. When accessories clutter the work surface, it doesn’t just look messy; it interferes with efficiency, ergonomics, and safety.

Finding a Way Forward

Budget constraints and evolving inspection processes aren’t going to resolve or stagnate in the foreseeable future, how we face these challenges will directly impact how we integrate these changes and their success in our spaces.

  • Assess your inspection tool inventory and understand what you need to standardize your workstations
  • Evaluate your workflows for opportunities to centralize and consolidate specialized accessories to be equally shared across the department if full standardization across all workstations are not feasible.

Prep & Pack is the engine of the sterile processing department—and like any engine, it runs best when the pieces are aligned. By acknowledging these unique challenges and working collaboratively toward smart, resource-conscious solutions, departments can improve consistency, reduce technician frustration, and elevate patient safety.

Explore more blogs discussing prep & pack operations here!